- Home
- Drawing Tutorials
- Drawing Studio Setup
3 Keys to an Effective Drawing Studio Setup
Your drawing
studio setup is essential to a successful drawing, and to an enjoyable drawing
process!
Enjoyed this lesson? It's from the Drawing Decoded Membership!
Prefer to read? Here is the video transcript:
When learning
any new skill, challenges are unavoidable, to be expected, and even welcomed,
because they are evidence that you are evolving your abilities.
What we can avoid is a problematic drawing setup that hinders your progress.
For example, many methods of measurement that you will learn in the coming lessons depend on a proper drawing setup, and they simply will not work otherwise. Furthermore, a poor setup can actually cause distortions in your drawing! So, let’s make sure that your drawing setup sets you up for success.
3 Elements of an Effective Drawing Studio Setup
- Your line of sight must be perpendicular to your drawing
surface.
Meaning that the angle between your drawing surface and your line of sight must be 90 degrees.
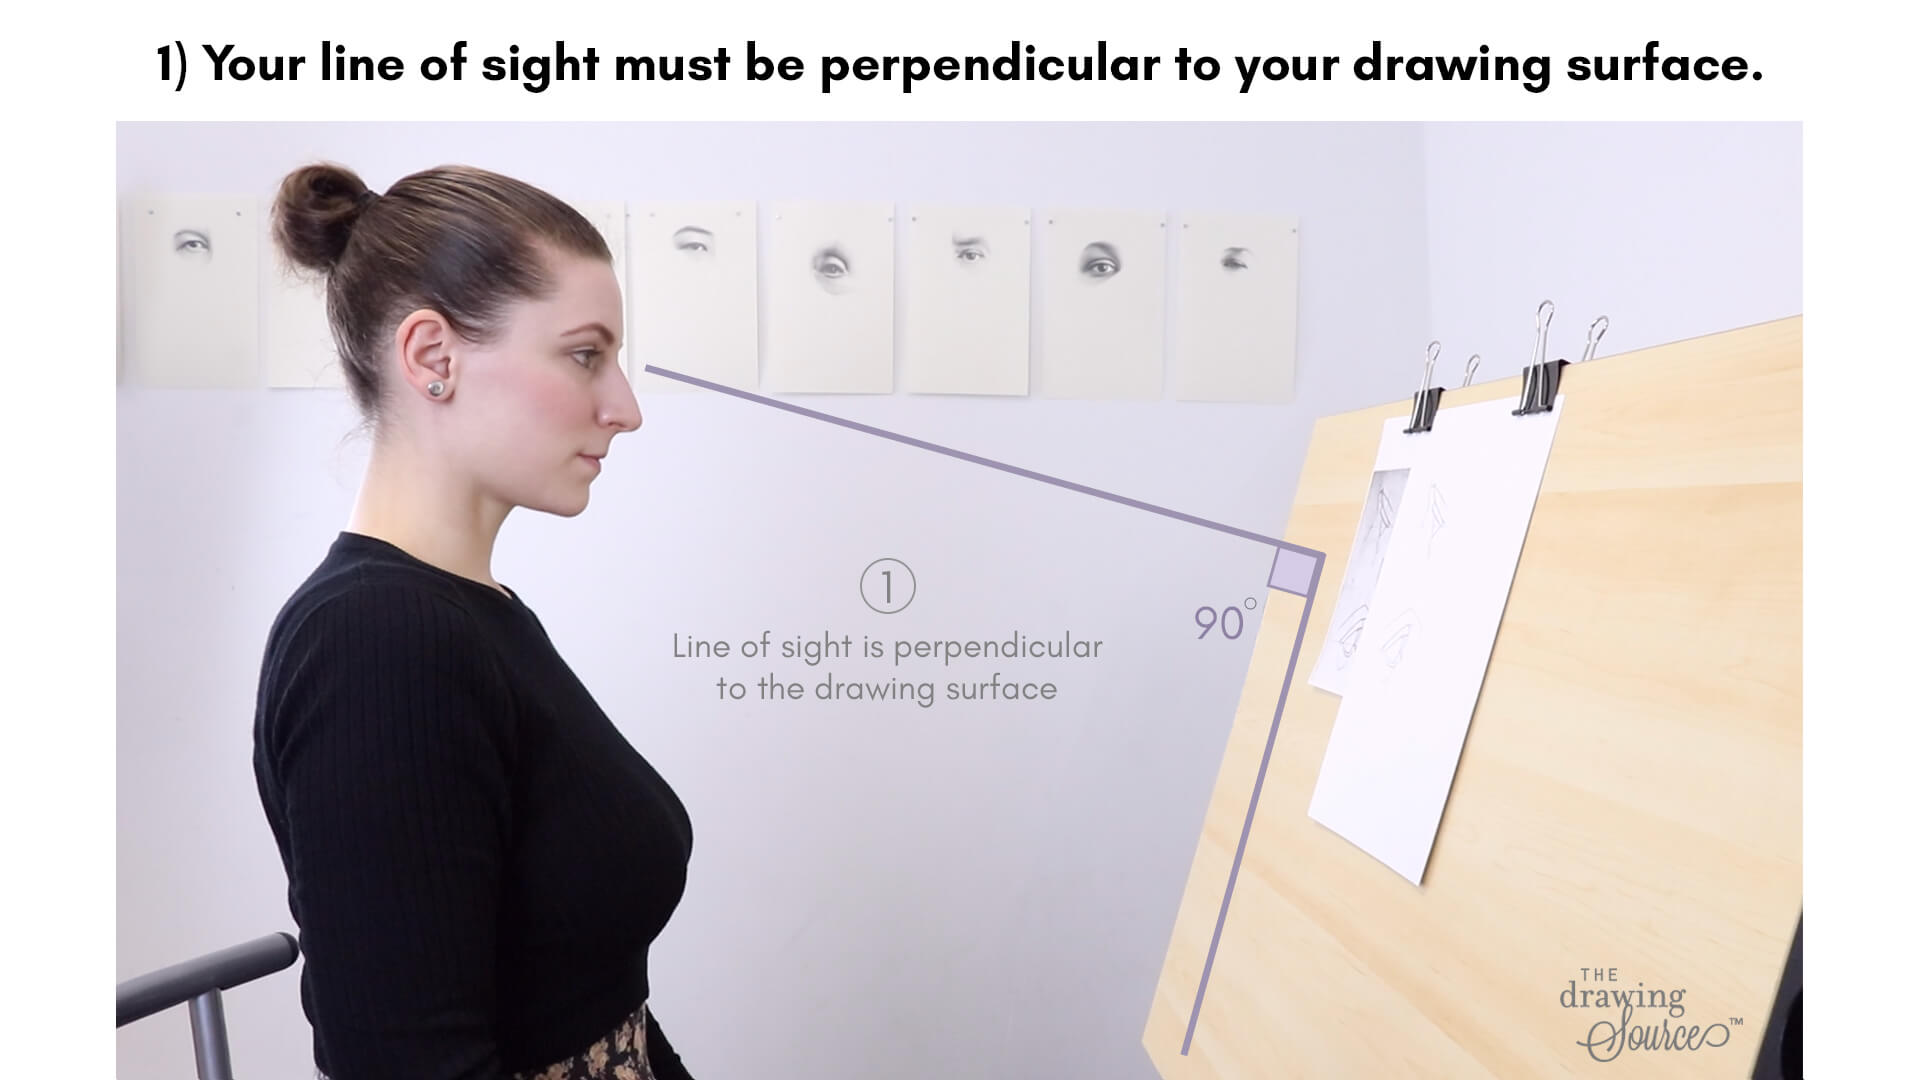
Why is this so important?
Because, if your drawing surface is not perpendicular to your
line of sight, it can cause dramatic distortions in your drawing.
For example, if I draw a random shape and then
tilt the page from a straight on view to a 180 degree angle, notice how
drastically the shape changes. As shown in the video clip below, it essentially becomes a different shape with
different angles and proportions:
An example of the distortion that can occur when we draw flat on a table, and then raise our drawing to view it straight on.
The same thing happens when you draw flat on
a table, where your drawing is not perpendicular to your line of sight! Your proportions may appear correct ... until you raise your drawing to view it straight on, revealing considerable distortions, and we absolutely want to avoid this.
Furthermore, most of the methods of measurement that you will learn and use in drawing will only work if you have an upright drawing board that is perpendicular to your line of sight. (Interested in these methods of measurement? Learn 10 of them in my Bargue Drawing Level 1 course, which is included in the Drawing Decoded Membership!)
Ways to Create an Ideal Drawing Studio Setup
There are many ways to create an ideal drawing setup! For example:
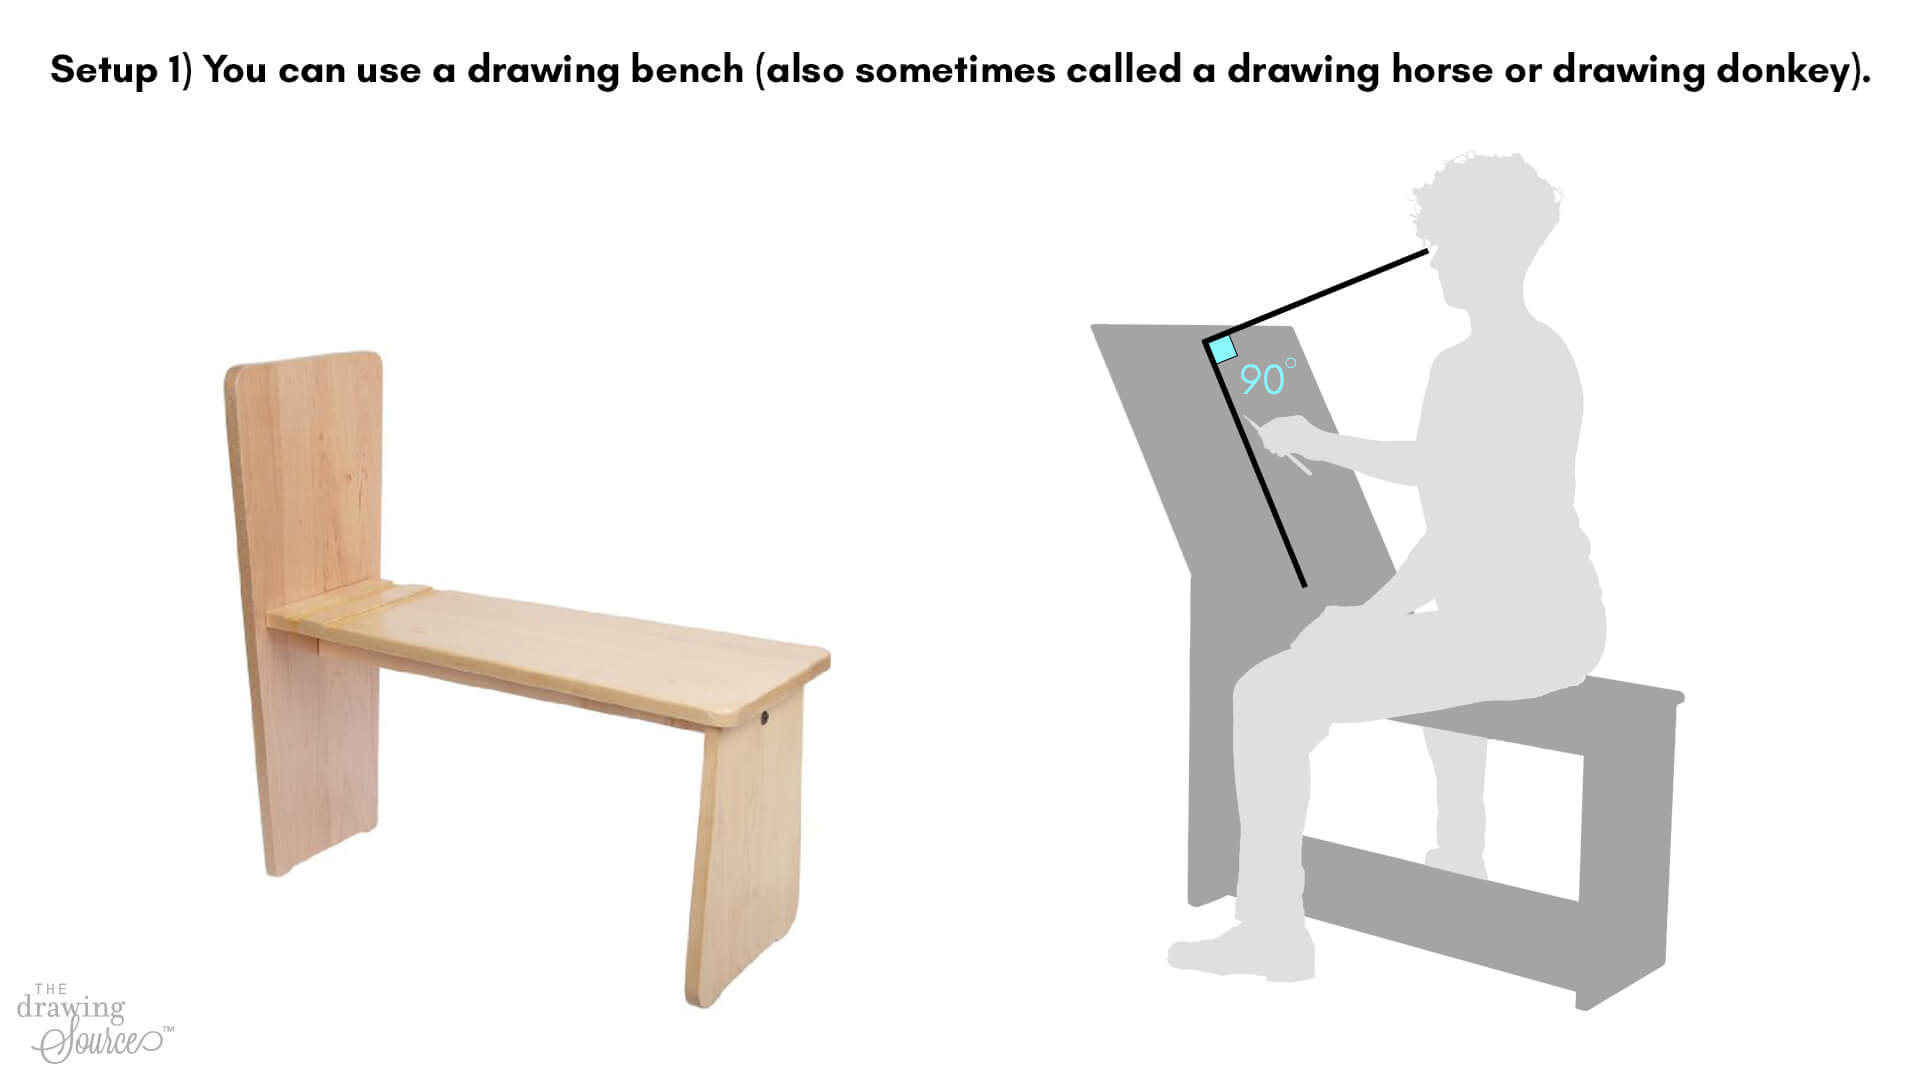
Setup 1) You can use a drawing bench, also sometimes
called a drawing horse or drawing donkey.
These are designed to create that
90 degree angle between your drawing surface and your eye.
Setup 2) You can mimic the previous drawing setup by placing
your drawing board on your lap and leaning it against a table.
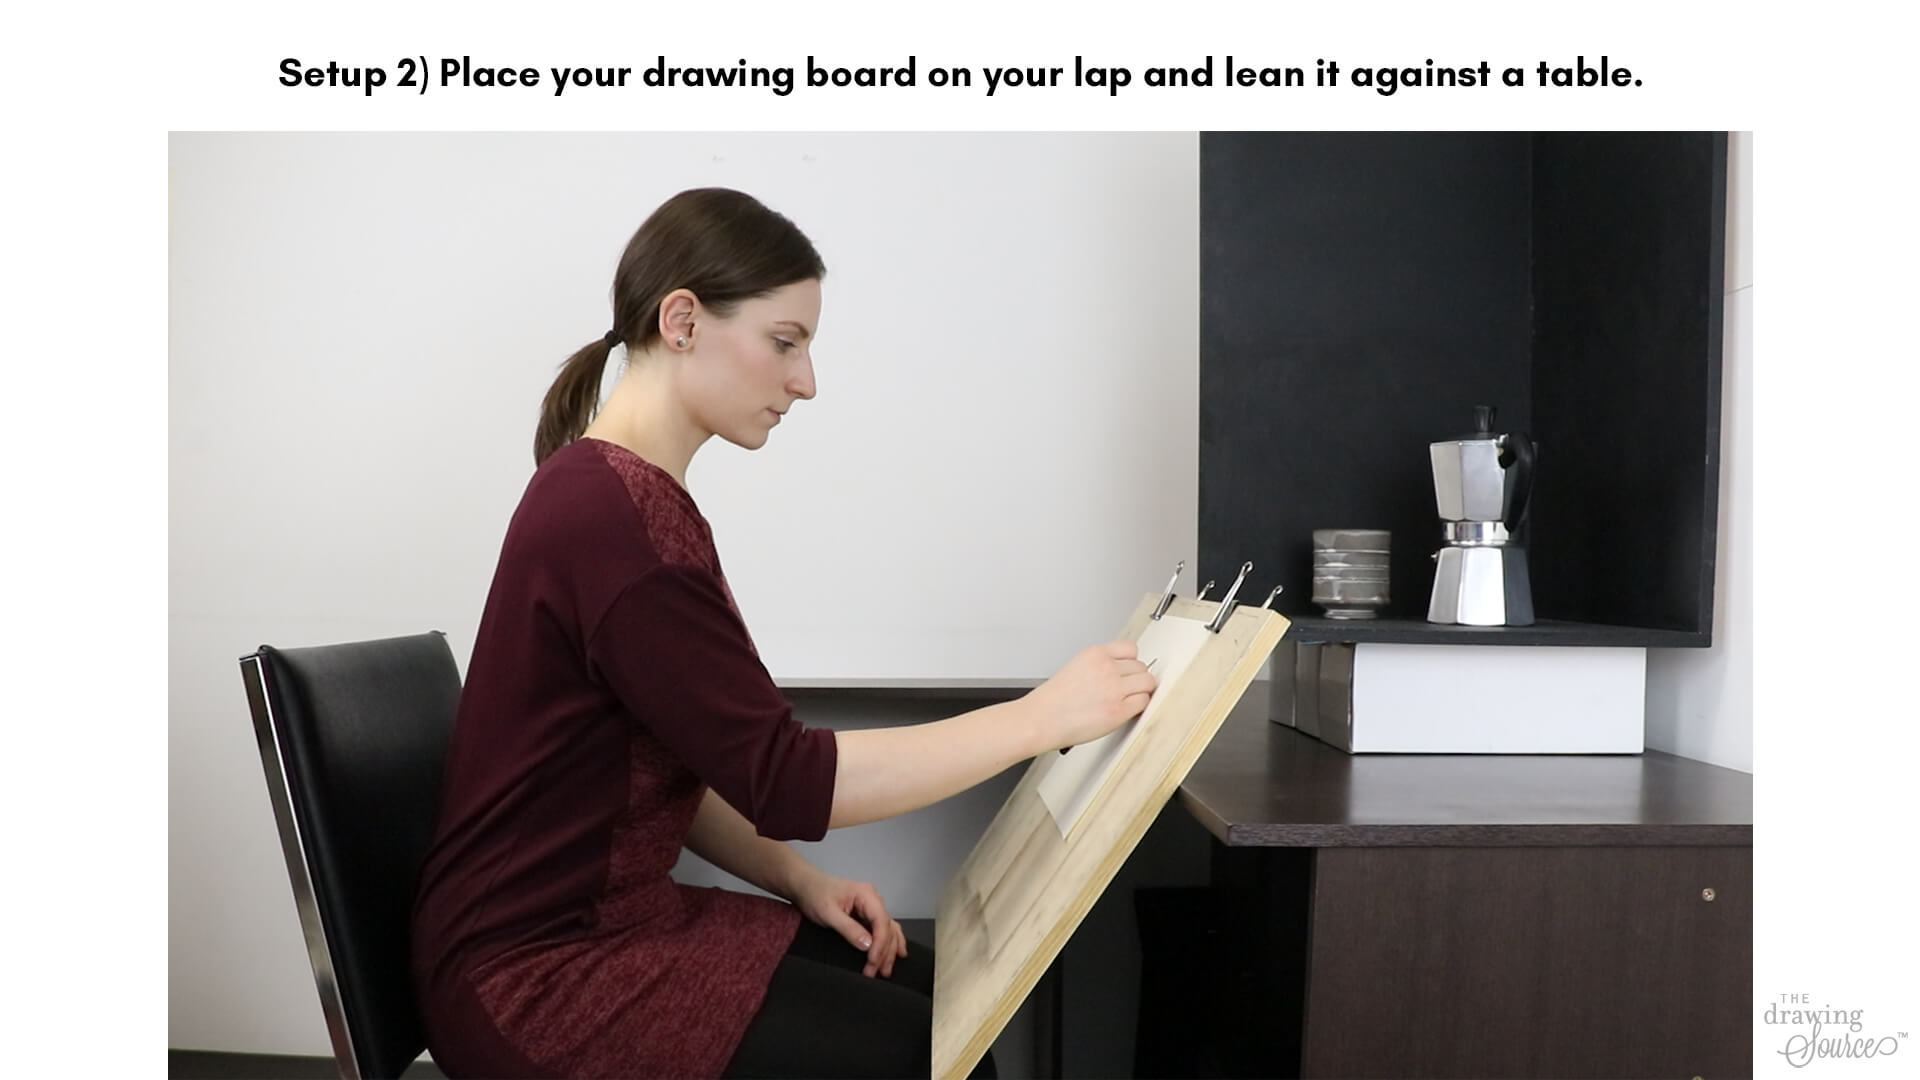
For this setup to be effective, position your drawing board
closer to your knees. For the measuring techniques we use in drawing (which you can learn in Drawing Decoded), you’re going to need enough room between your body and your
drawing board to fully extend your arm, and to move it from your drawing to
your subject.
It might take some experimenting to find a table that’s tall
enough to support the drawing board. If your table is too short, you can place
something heavy on the table to lean your board against:
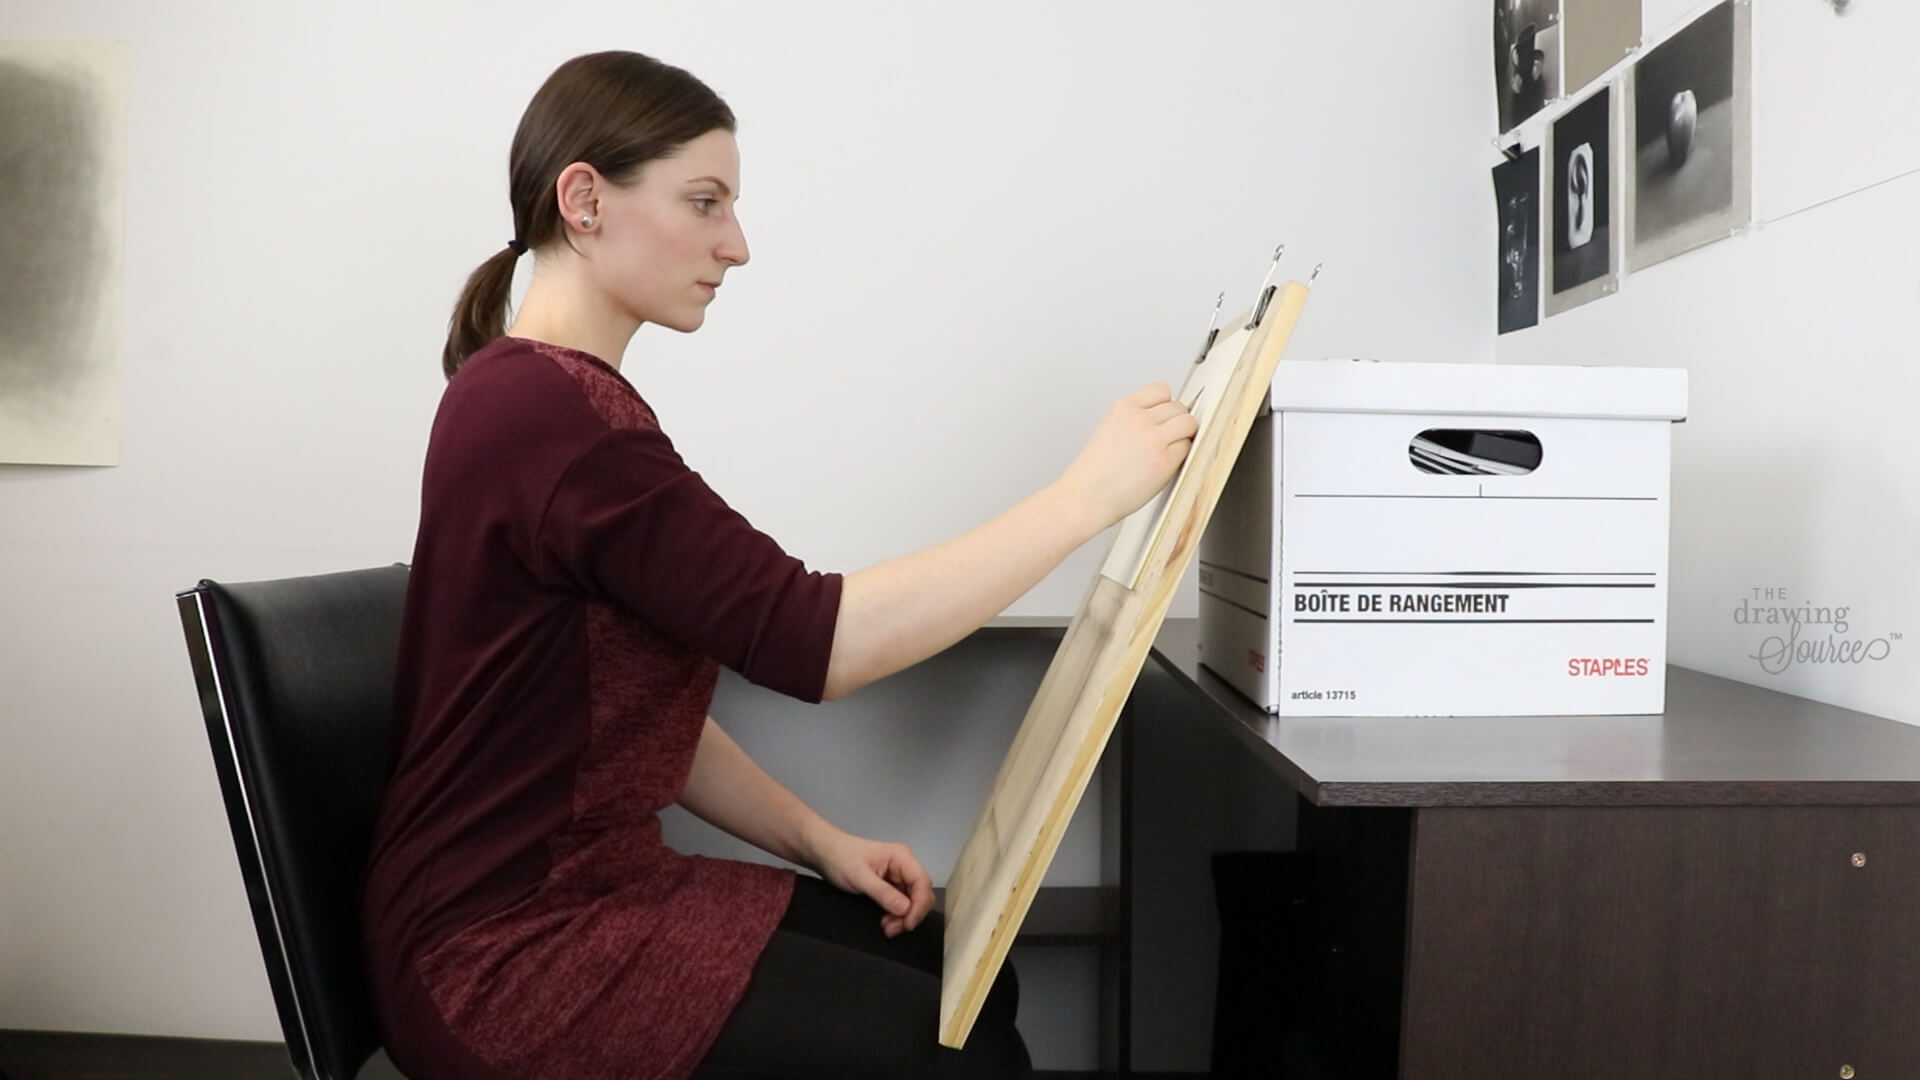
This is probably the least expensive and most accessible drawing setup,
and the one that you’re most likely to use. And it works perfectly well!
This is the setup I used for years until recently, when I bought an adjustable drafting table.
Setup 3) You can use an adjustable drafting
table.
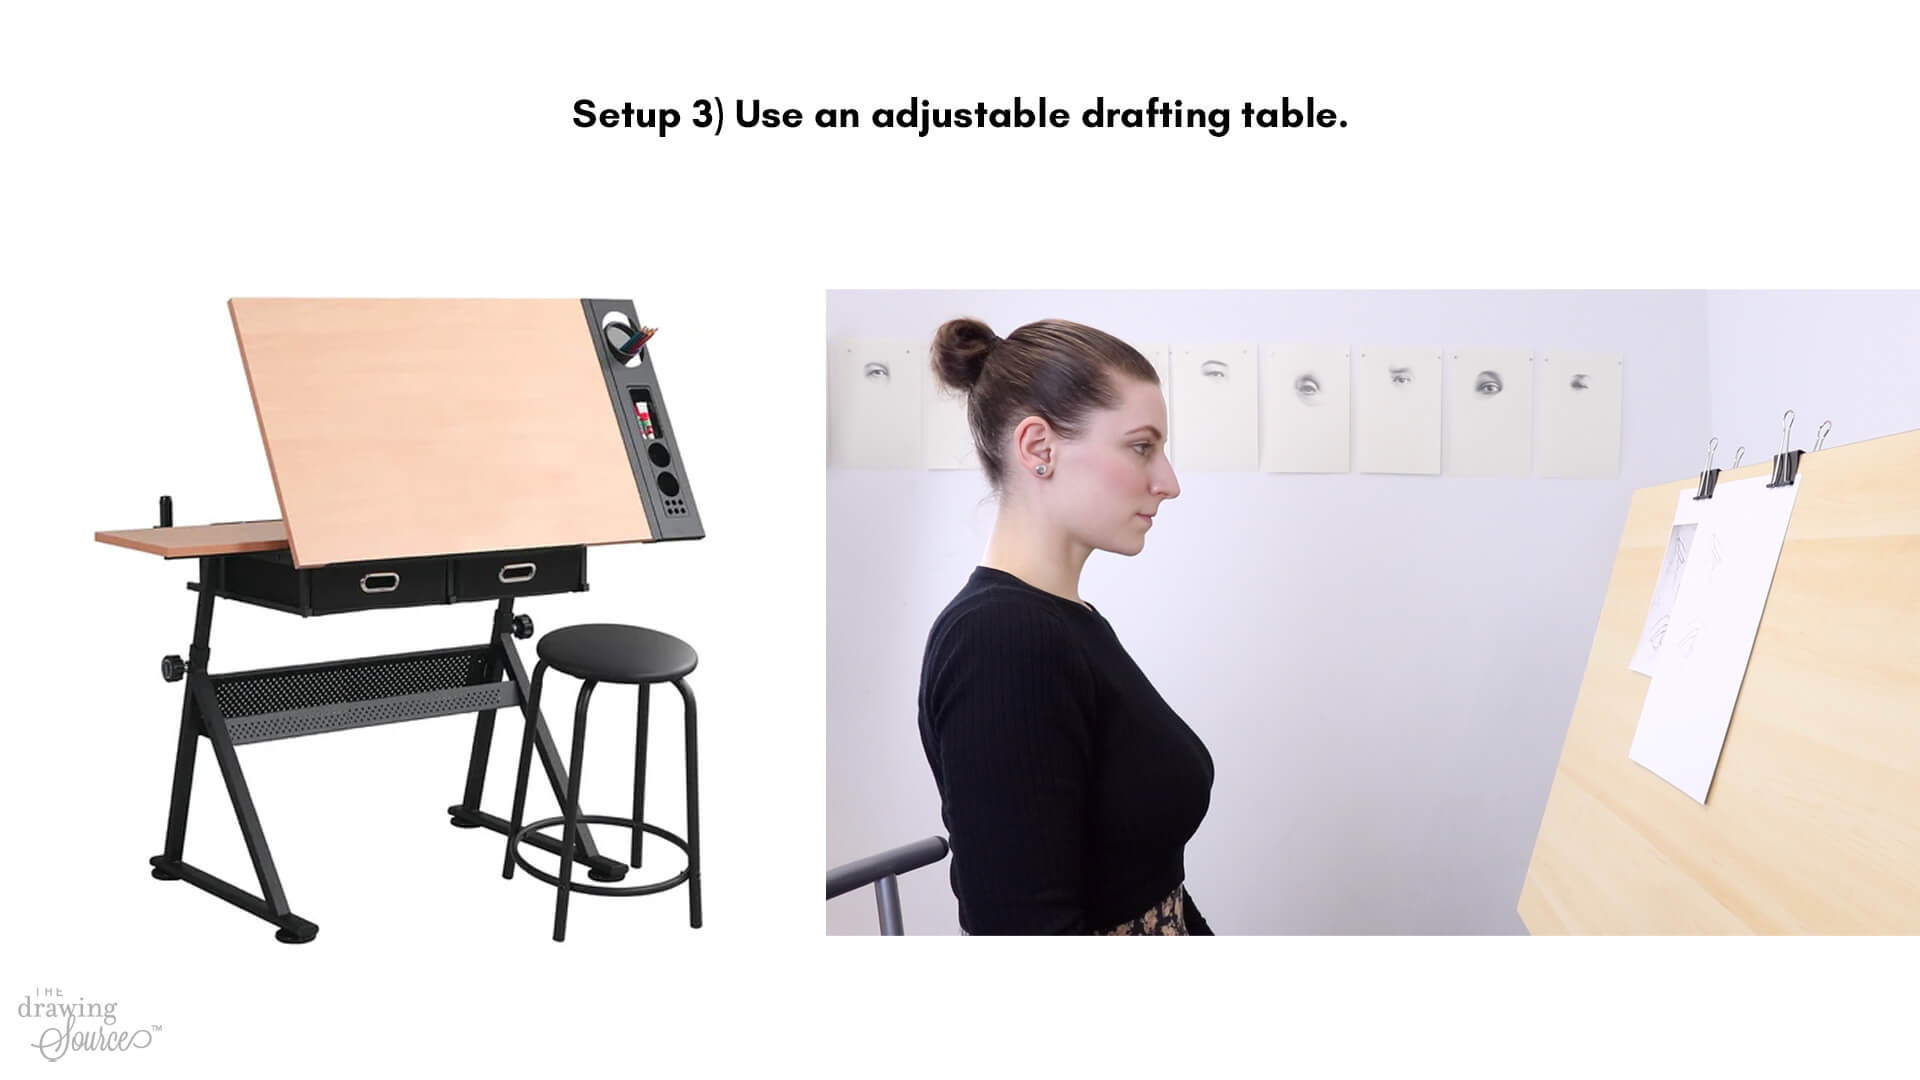
This is a pricier option that I invested in quite recently (and now I can't imagine not having it!)
If you choose to buy a drafting
table, make sure that it can be angled to 90 degrees or very close to 90
degrees. Many of the less expensive ones only adjust to 60 or 75 degrees, and I
do not recommend those, because it will be more difficult to retain that essential 90 degree angle between your drawing board and your line of sight.
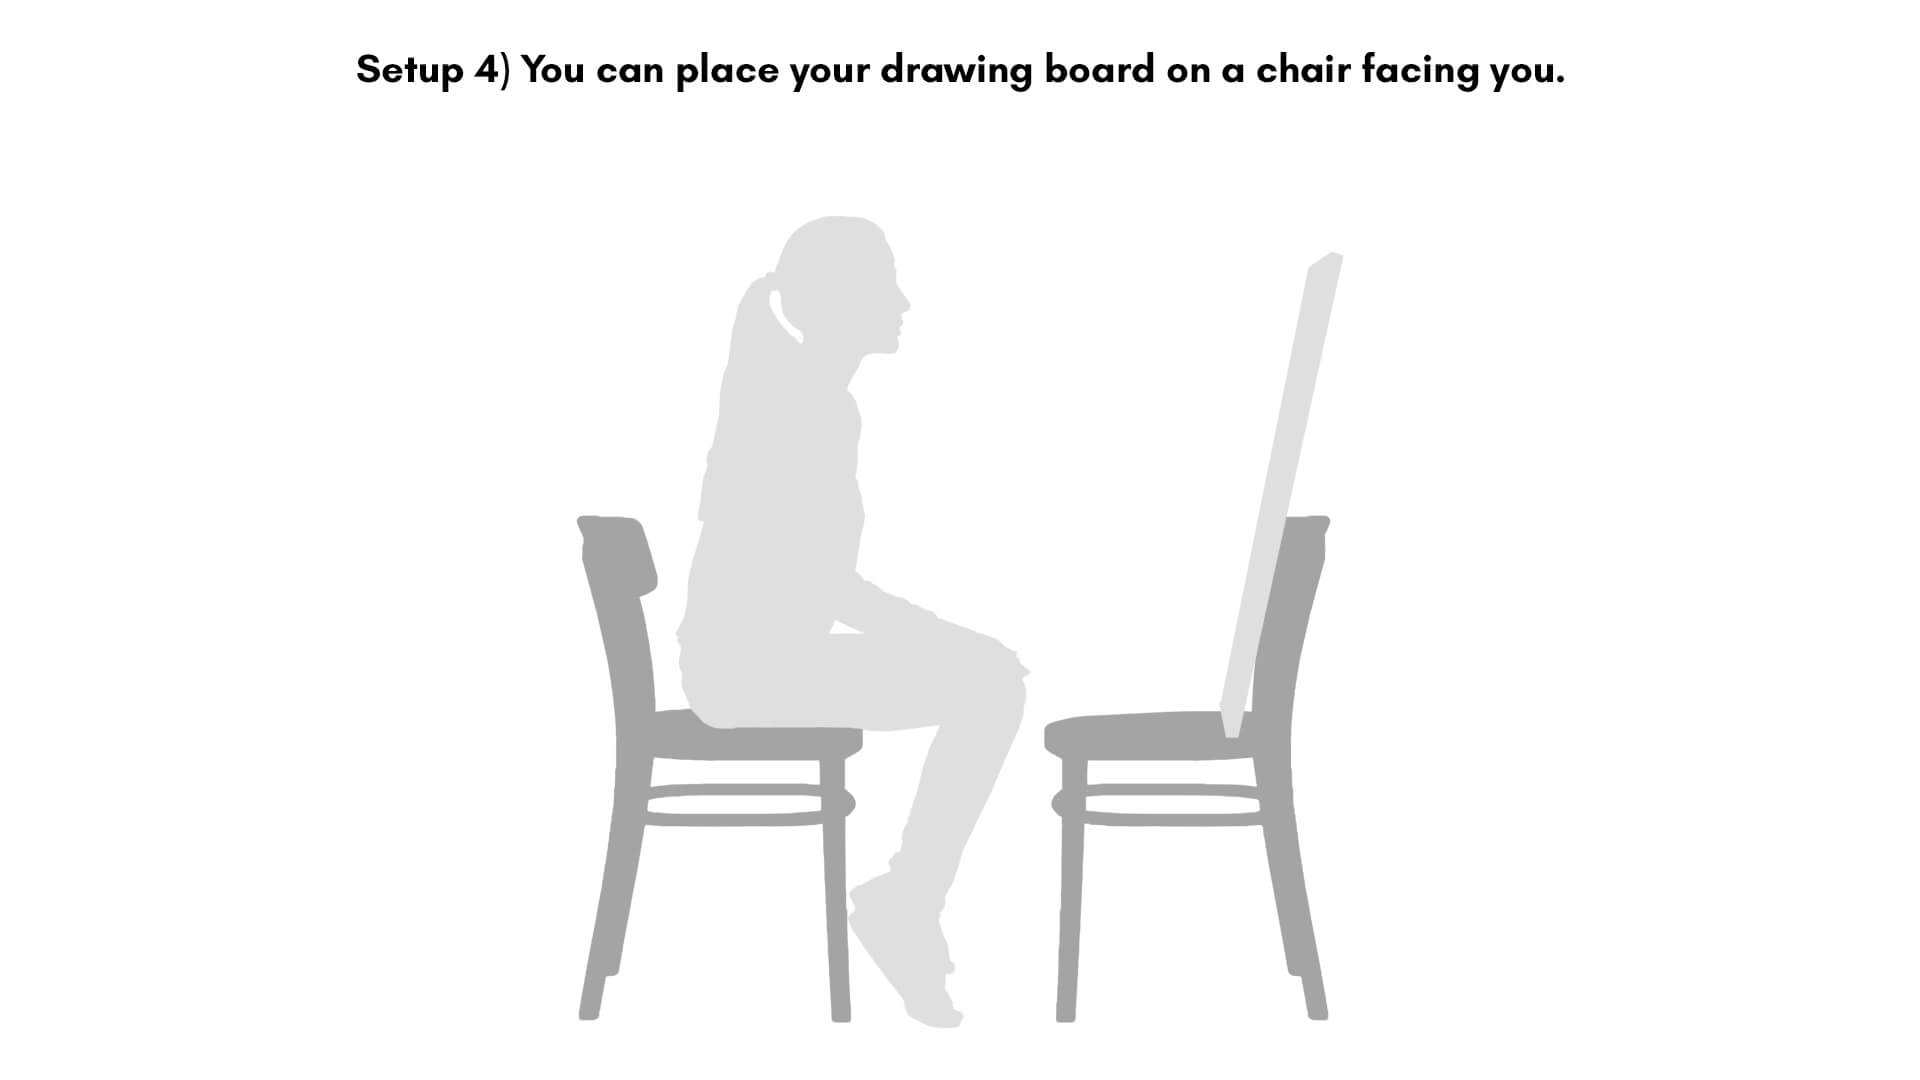
Setup 4) You can place your drawing board on a chair
facing you.
Setup 5) You can draw at an easel (seated or standing).
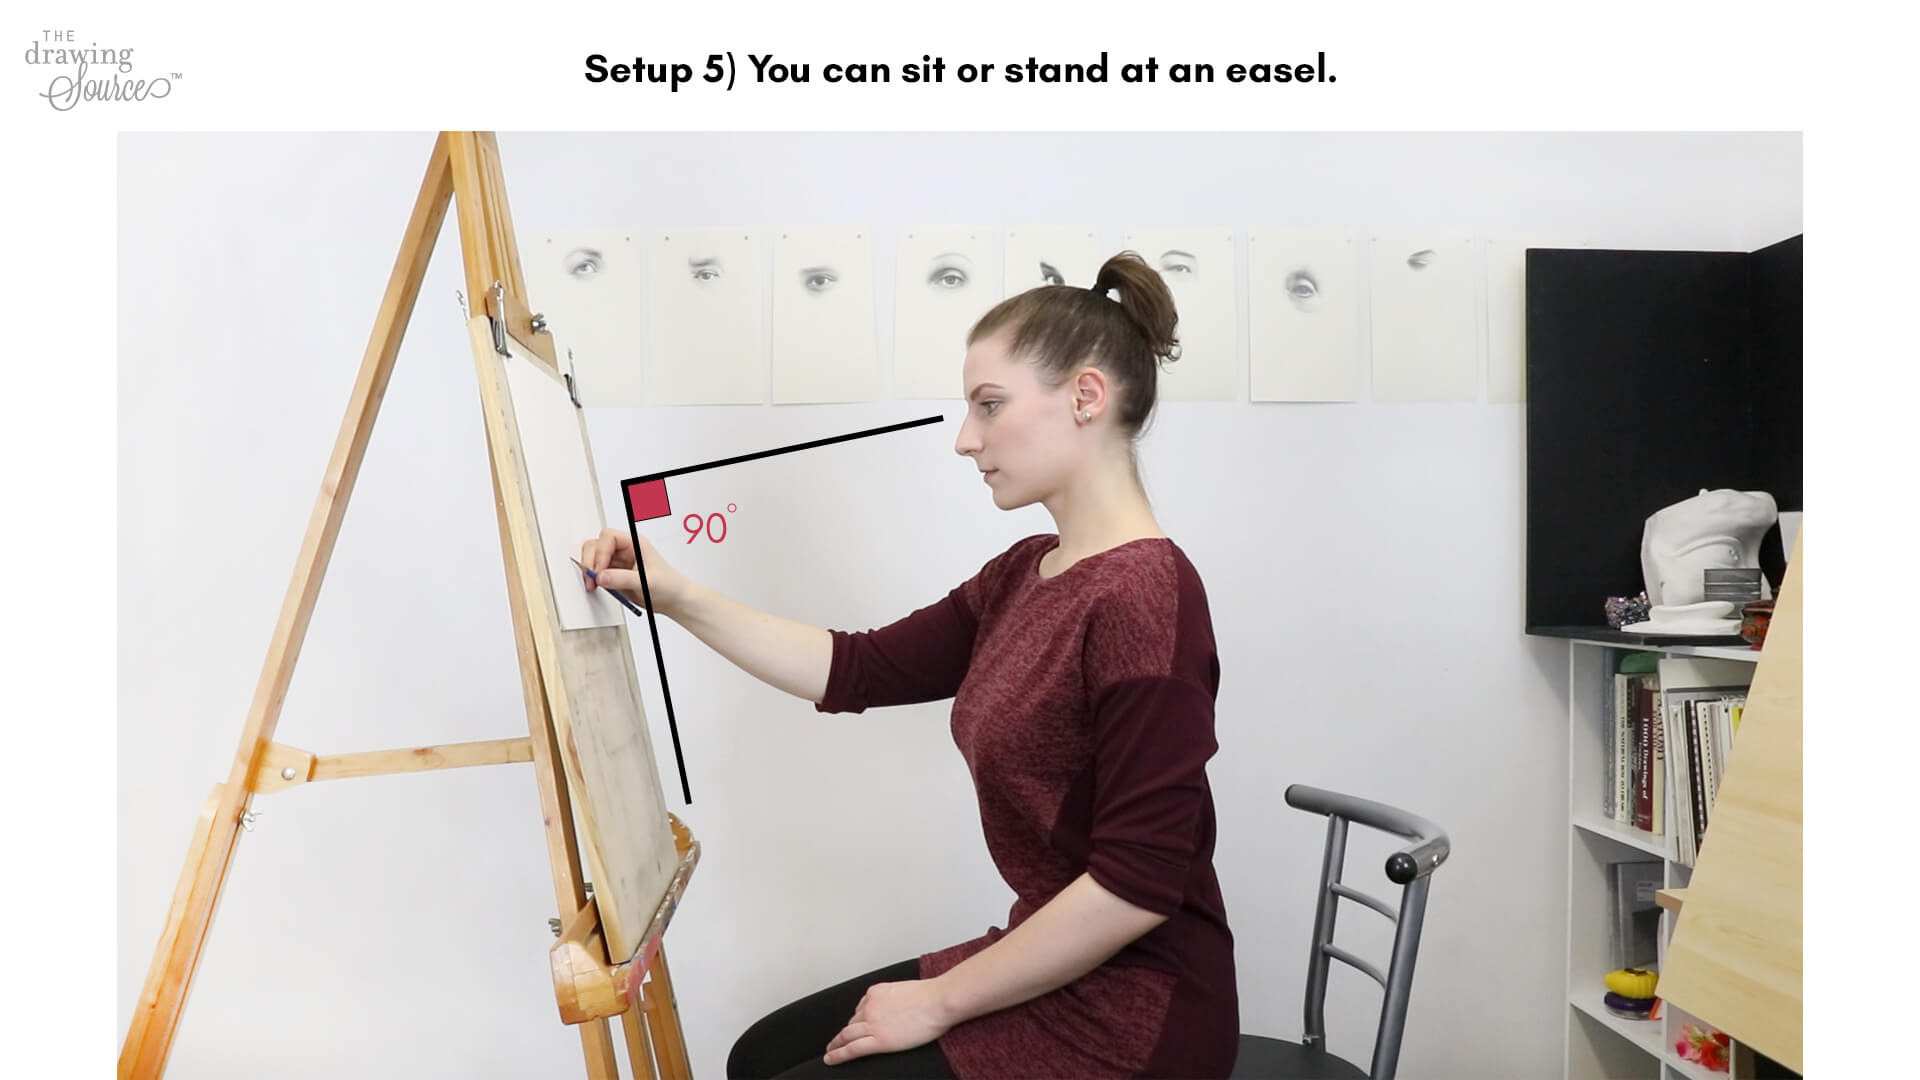
Notice that if you’re sitting or standing up straight,
looking straight forward with no bend in your neck, your drawing board has to
be perpendicular to the ground.
If you are leaning slightly forward (as I am in the photo above) or have your head tilted slightly down, your easel can be tilted slightly as well to retain that 90 degree angle between it and your line of sight.
Finally, make sure that your drawing board is not tilted to
the right or left. The top, bottom, right and left sides of your drawing
surface should be at the same distance from your eye.
Whichever setup you choose, make sure that you can have good posture while you draw so that you don’t end up with unnecessary back problems.
And if possible, allow for some space behind your drawing
setup, because we will be building up the habit of routinely stepping back from
our drawing to view it from a few paces away. This is extremely helpful for
noticing differences in proportions between the subject and the drawing.
The 2nd Essential Element of a Good Drawing Setup
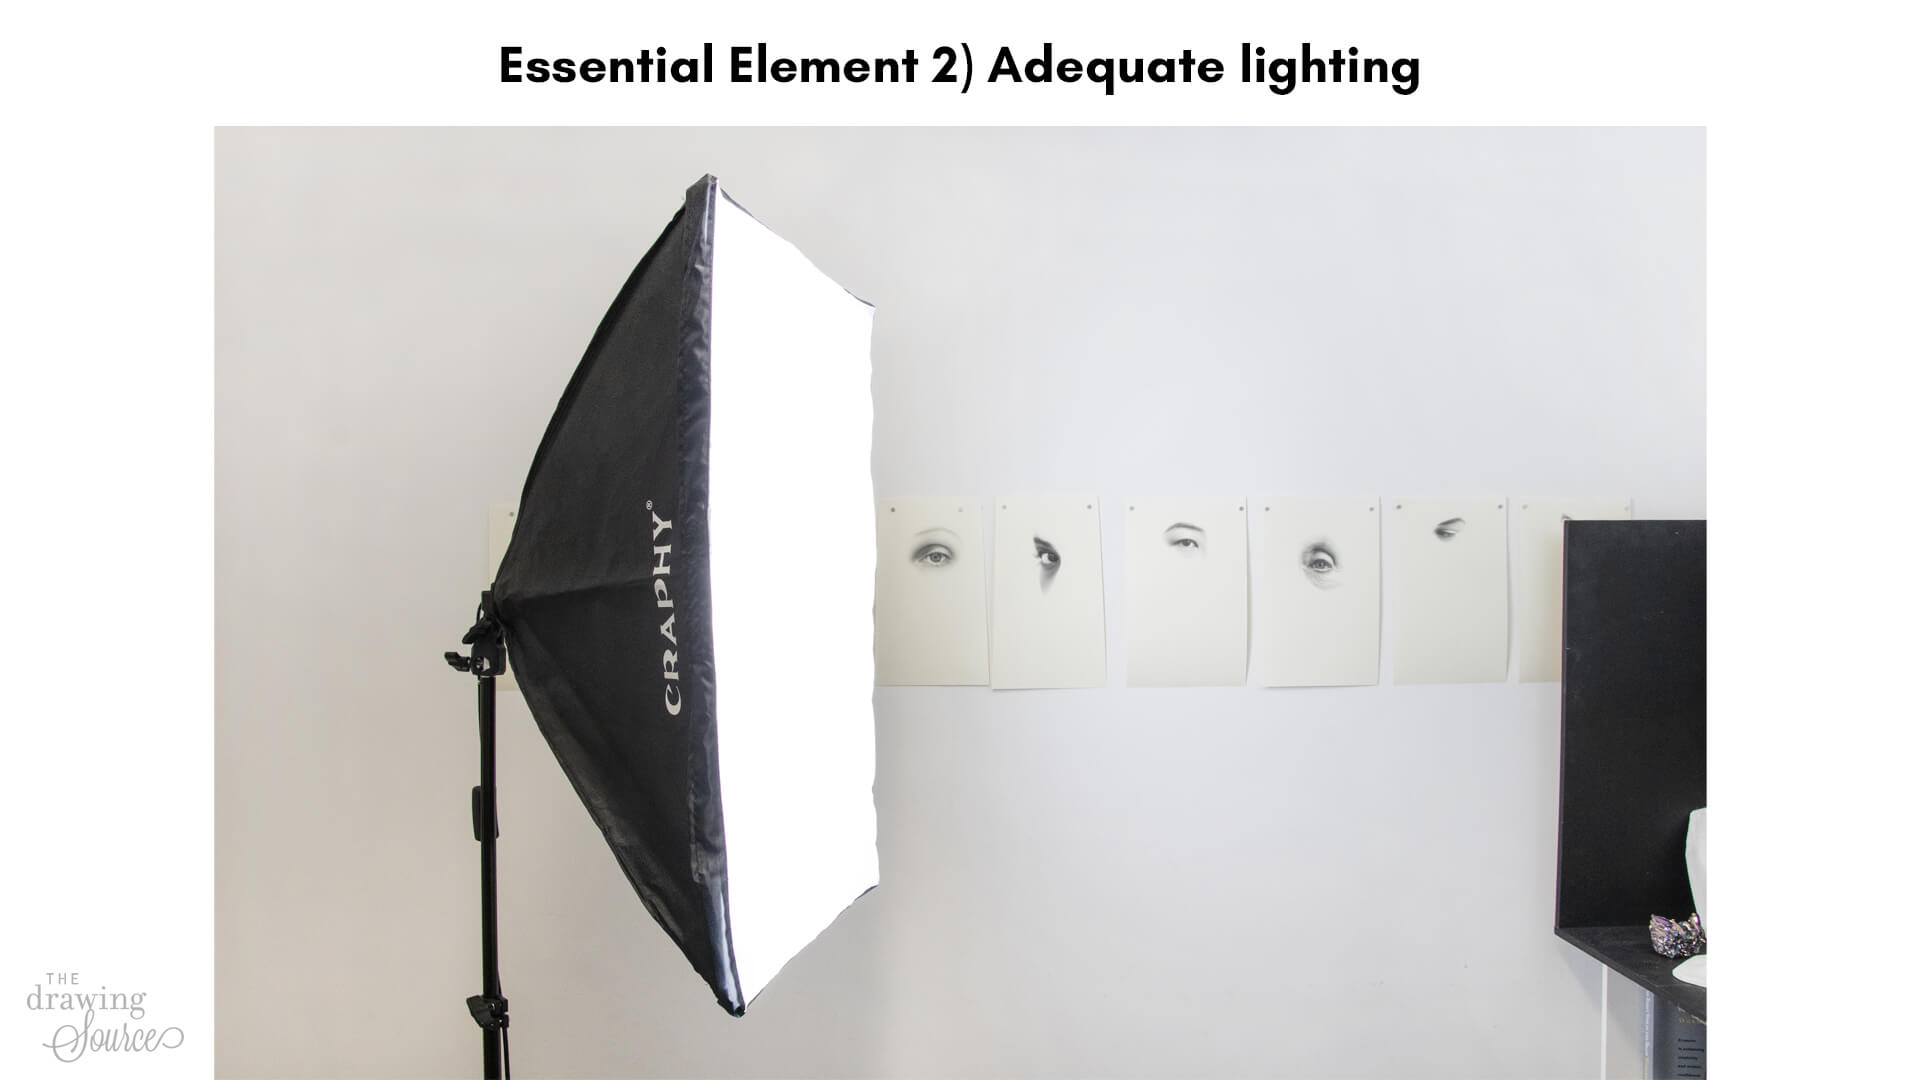
The second essential element of a good drawing studio setup is
adequate lighting.
This will help to prevent eye strain, and unpleasant
surprises when viewing our drawing in a room that’s brighter than the one we
were drawing in.
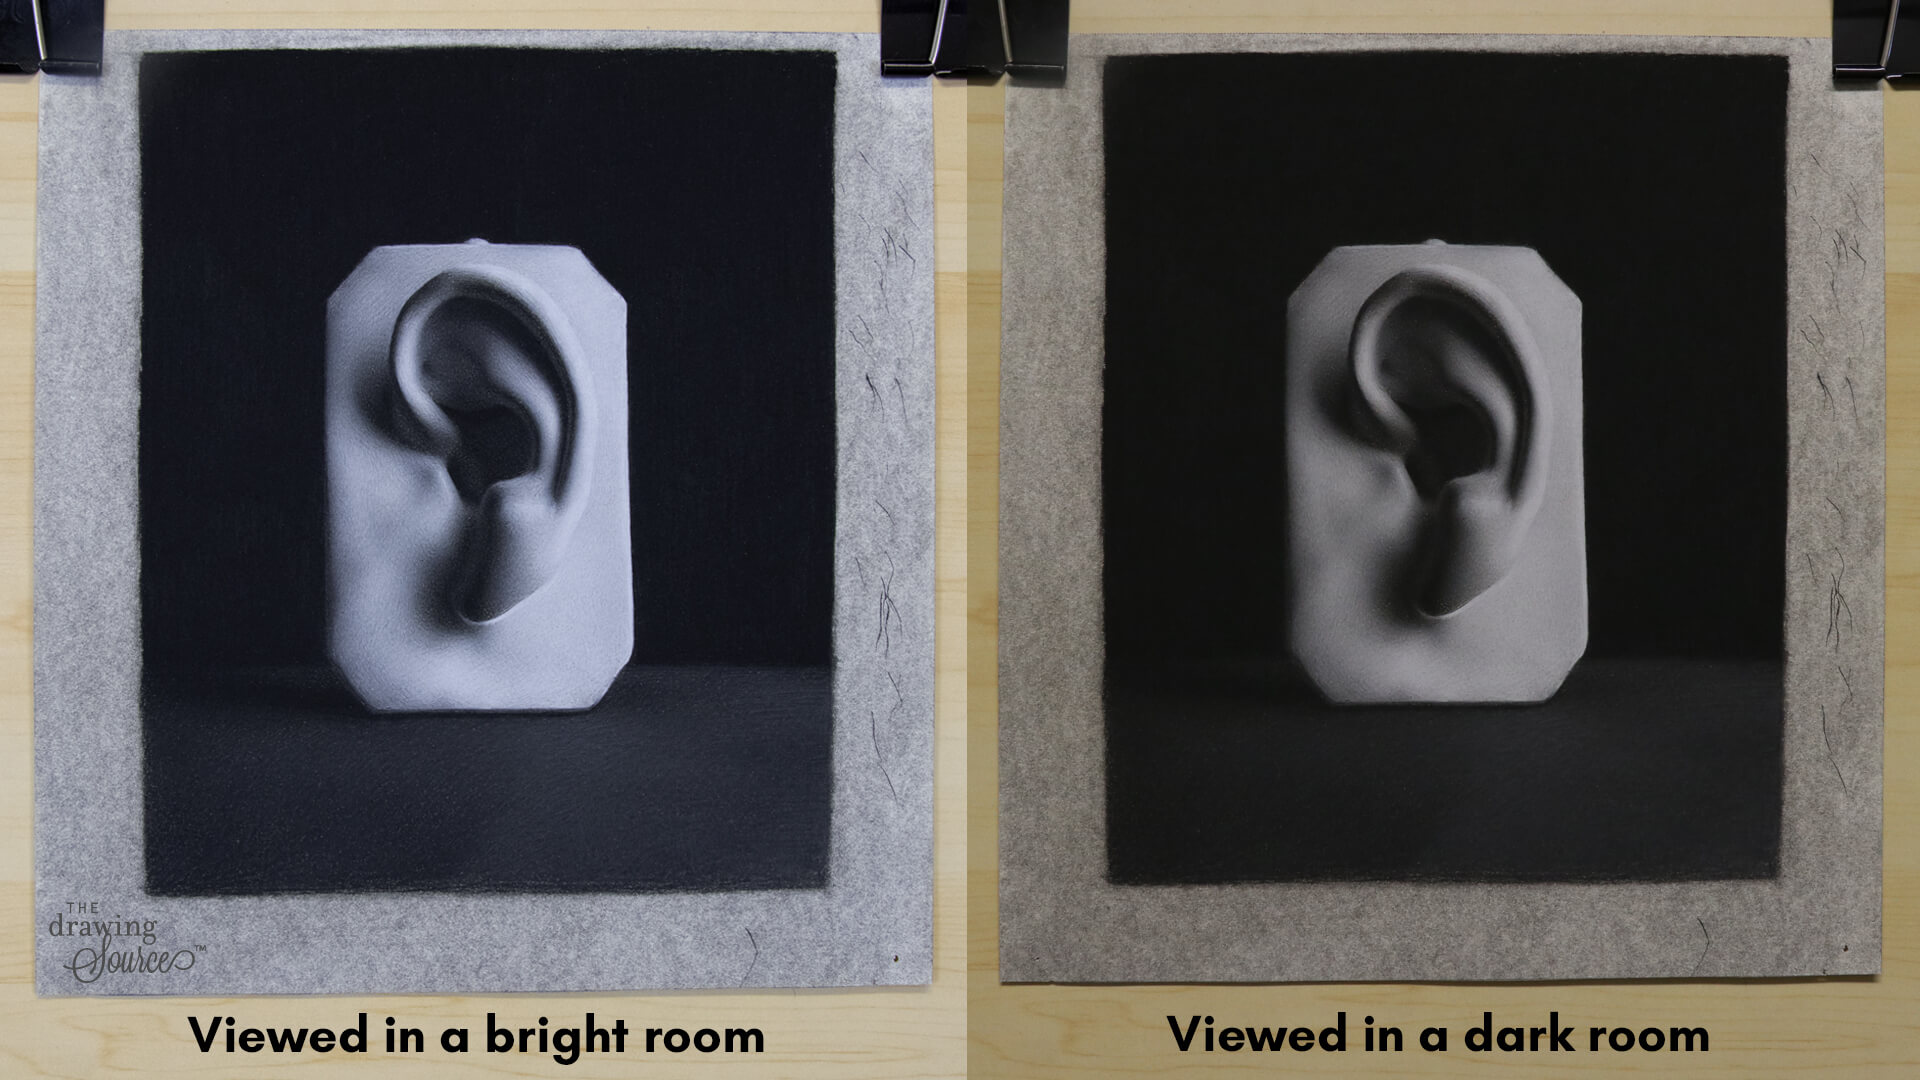
Especially once we start drawing more ambitious subject
matter, we want to make sure that we are working on our drawings in a similar
lighting environment as they might be displayed or viewed in.
The ideal lighting is bright and even across your paper. This can be accomplished using natural or artificial lighting. I have a soft box lighting kit similar to this one, that I love.
The 3rd Essential Element of a Good Drawing Setup
Finally, I always pad my drawing paper with a few extra sheets. This creates a smoother drawing surface and prevents me from picking up any texture from my drawing board.
Example of an Effective Drawing Studio Setup:
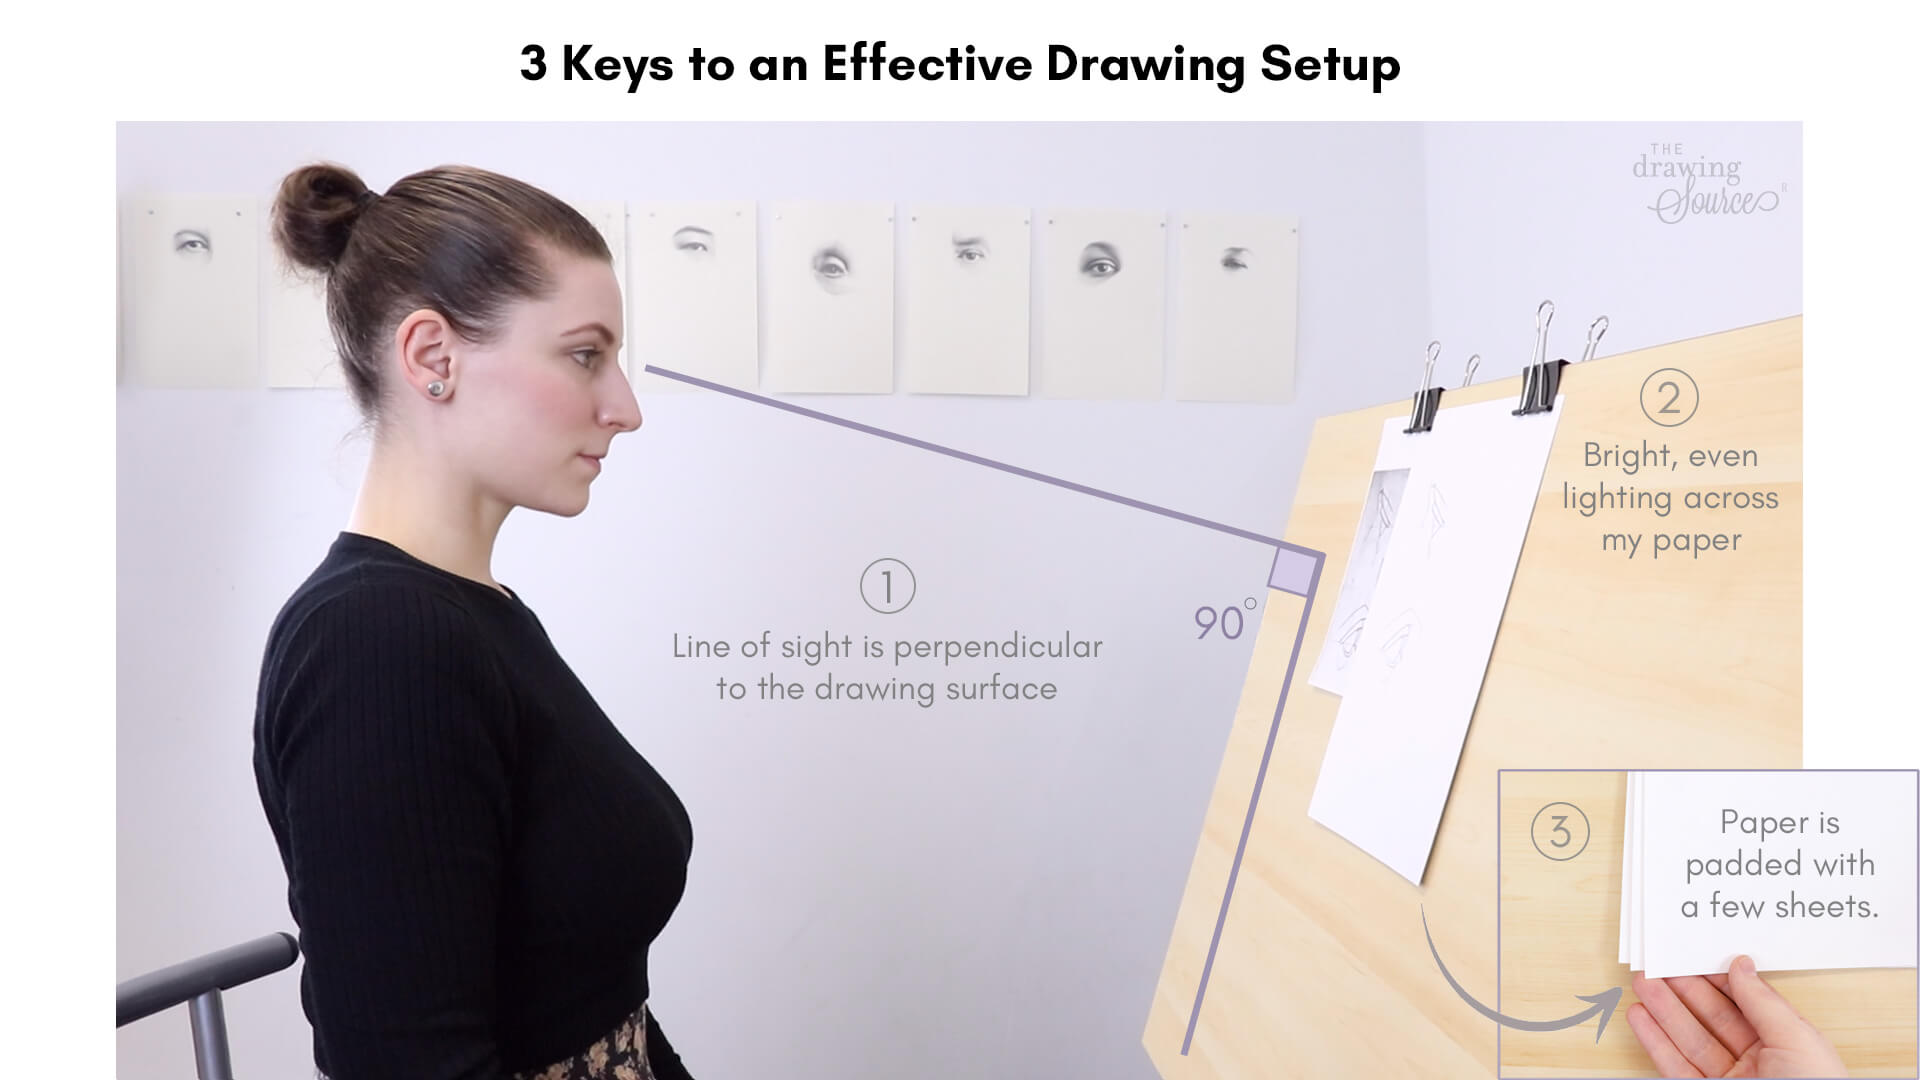
As an example, here is my final drawing setup.
- My line of sight is perpendicular to my drawing surface (to avoid distortions, and to allow me to use the methods of measurement effectively)
- I have plenty of light that is evenly distributed across my paper (to avoid unpleasant surprises when viewing my drawings in a different lighting scenario!), and
- My drawing paper is padded with additional sheets of paper underneath (to create a smoother drawing surface and to make sure that I don’t pick up any texture from my drawing board).
I hope these tips help you set up a comfortable, enjoyable and productive drawing space. If you have a drawing setup that you're particularly proud of and would like to share, please let me know at info@thedrawingsource.com
Happy Drawing,

Enjoyed this lesson? It's from Drawing Decoded: a curriculum demystifying realistic drawing.
