- Home
- Portrait Drawing
- Eye Drawing Hub
- How to Draw Eyelashes
Video: How to Draw Eyelashes
Step by Step Video Tutorial
Learn how to draw eyelashes step by step in this 2-part video series!
Eyelashes can be an important finishing touch on an eye drawing, and are so much fun to draw – if you know what you’re doing! Let’s make that sure you do, in this eyelash drawing tutorial.
In this video we'll cover 3 key points to know about eyelashes to draw them convincingly, and I'll show you the step by step drawing process.
If you haven’t watched Part 1 of this series - 8 Tips for Drawing Realistic Eyelashes - definitely do so before or after this one. These two videos are meant to be watched together for the best results in your eye drawings.
Watch the video here:
How to Draw Eyelashes Step by Step
Start your own eye drawing transformation:
Free Eye Drawing Resources
Don't miss these free tools to start improving your own eye drawings today:
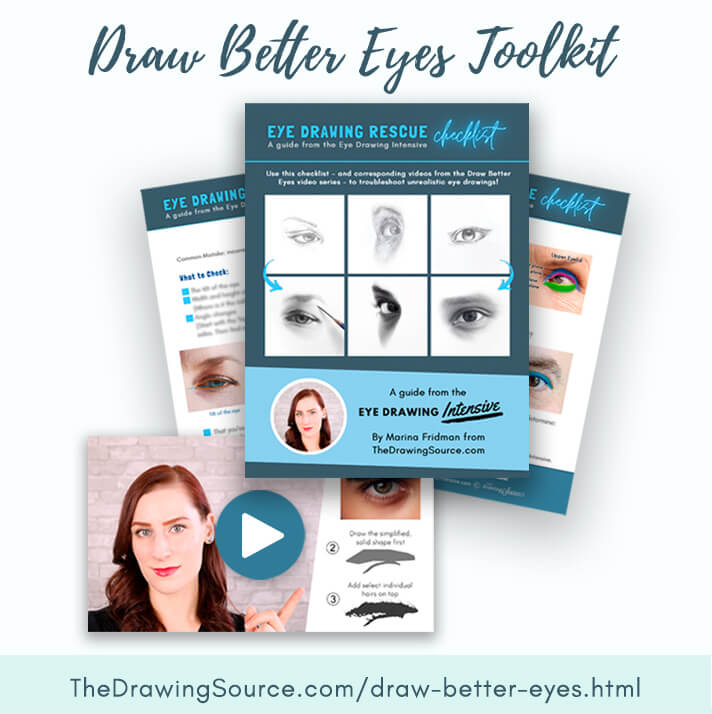
✔️ Draw Better Eyes Toolkit
Learn to troubleshoot your eye drawings and fix the most common mistakes that make them look flat and unrealistic.
✔️
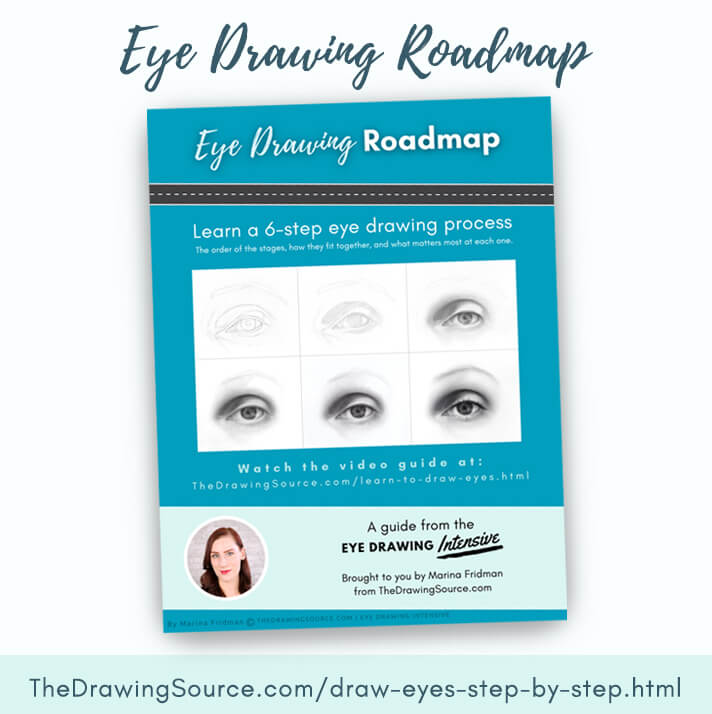
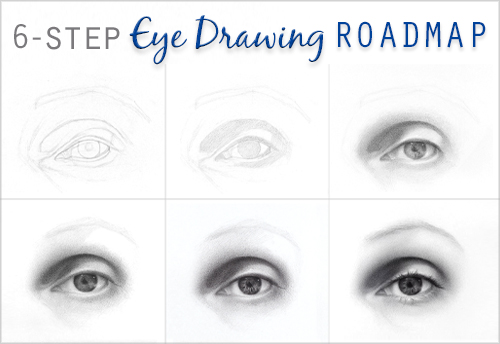
Eye Drawing Roadmap
Discover the 6-step eye drawing process - the order, priorities, and key takeaways from each stage.
A F T E R T H I S L E S S O N
Don't miss Part 2 of this video series:
And these eye-drawing lessons:
- Draw Better Eyes Toolkit
- The 6-Step Eye Drawing Process [Video Tutorial & Downloadable Guide]
- How to Draw Realistic Eyes [Step by Step Tutorial]
- How to Draw Realistic Eyebrows [Step by Step Tutorial]
Or, transform your eye drawings in the:
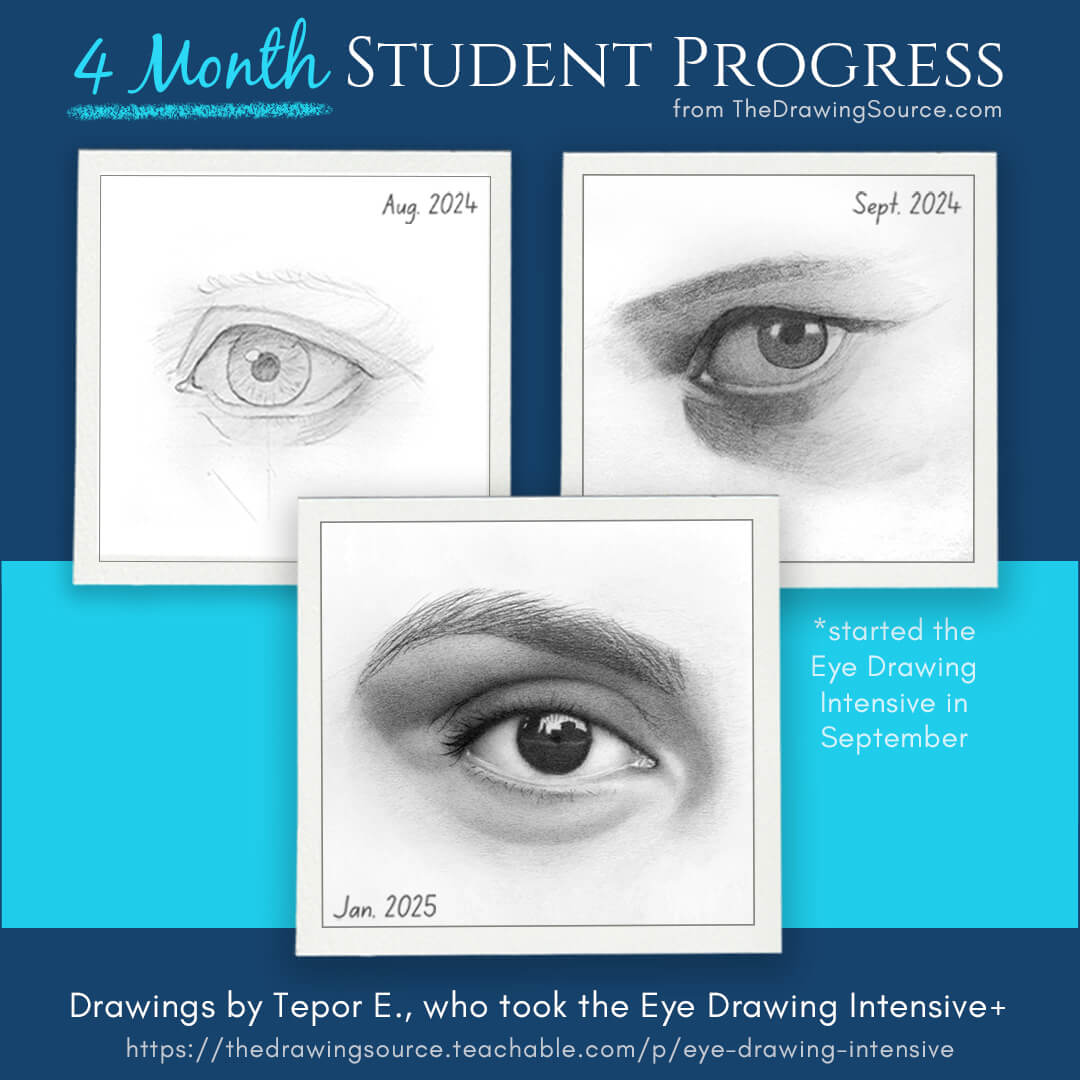
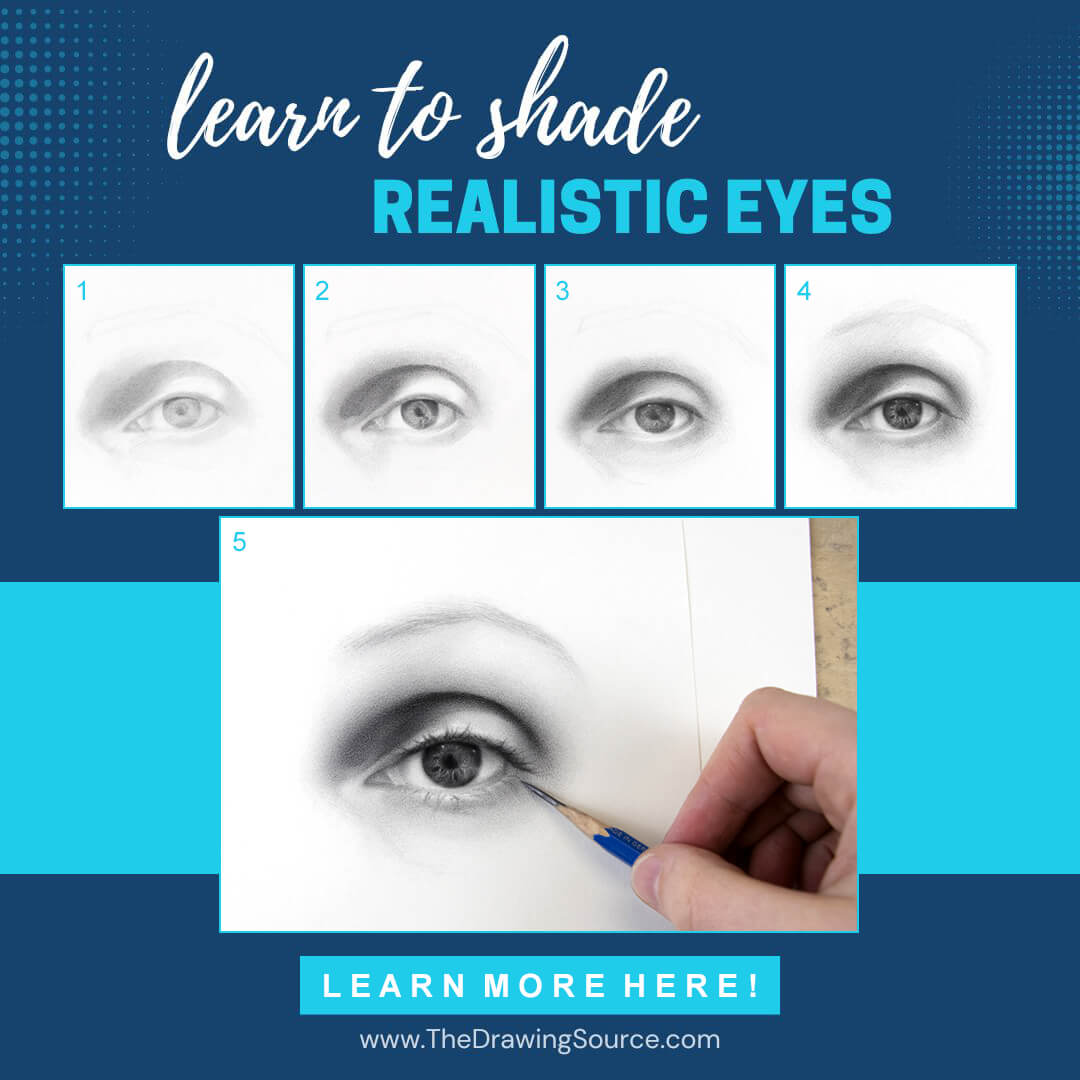
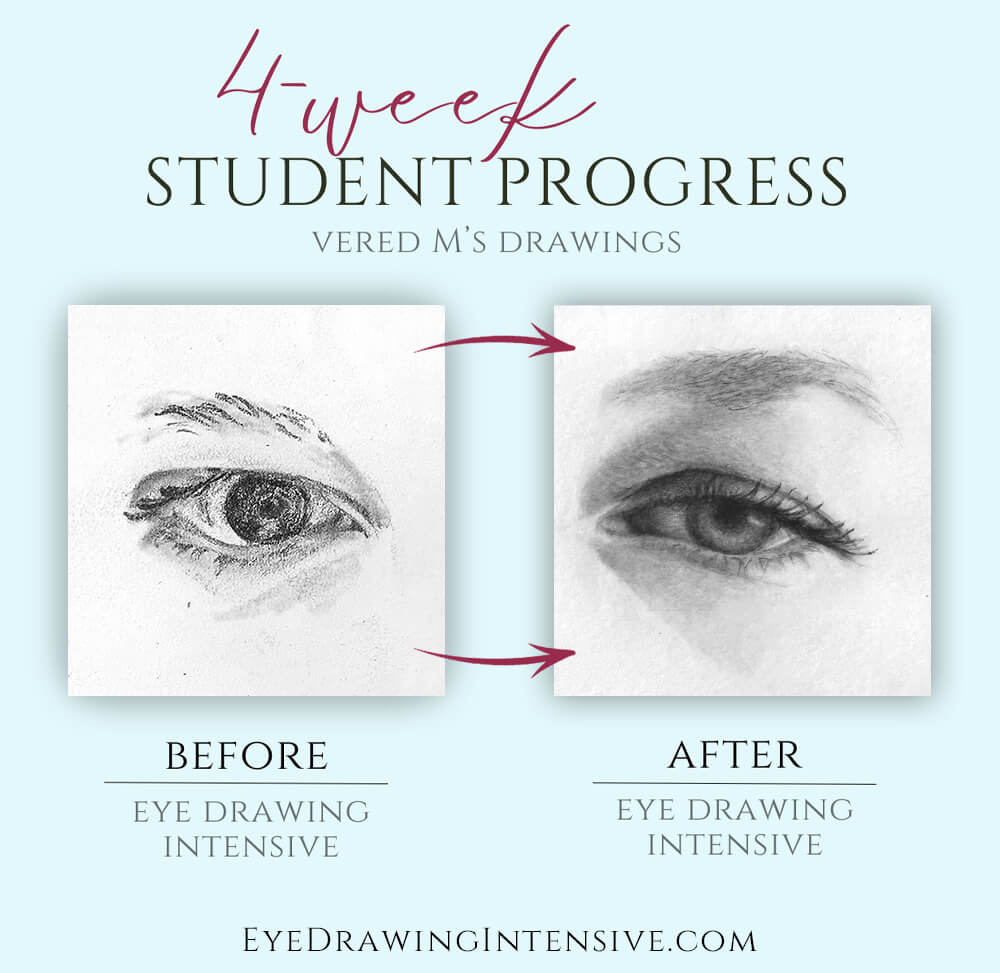
- Eye Drawing Intensive: Your shortcut to drawing realistic, evocative eyes that add emotion and expression to your portraits!
Supplies Used in the Drawing Demonstration:
Please note that the links below are affiliate links. I may earn commissions if you purchase supplies through these links. I will only ever recommend supplies that I use myself.
- Strathmore 400 Series Drawing
Paper: https://amzn.to/3X7XXxW
(This is an off-white paper. If you're looking for a white, smooth drawing paper, the following one is a good option.) - Strathmore 300 Series Bristol (vellum surface): https://amzn.to/3yJXFTY
- Staedtler Mars Lumograph Graphite Pencils: https://amzn.to/3Krm03F
- Staedtler Mars Lumograph Black Pencils: https://amzn.to/458bwzo
- My favorite Kneaded Eraser brand: https://amzn.to/3X7MU7Y
*Note: For years, my go-to graphite pencils have been
Staedtler Mars Lumograph Graphite Pencils, which are the blue ones in the
video. In this drawing I also experimented with Staedtler Mars Lumograph Black
pencils. They haven’t become a staple in my drawing practice, but they did help
me achieve some of the darkest values in this drawing, while avoiding the glare
or shine that dark values drawn using pure graphite usually produce.
Prefer to read? Here is the article version of the video!
(... there is more info in the video, though, I recommend it!)
Before we start the step by step tutorial on how to draw eyelashes ...
3 Keys to Know About Eyelashes
to Draw them Convincingly
Let’s
start with 3 elements you should know about eyelashes to draw them convincingly.
1) Placement:
First, let’s make sure you’re drawing eyelashes in the right place!
As I mention in Part 1 of my Most Common Eye Drawing Mistakes video series:
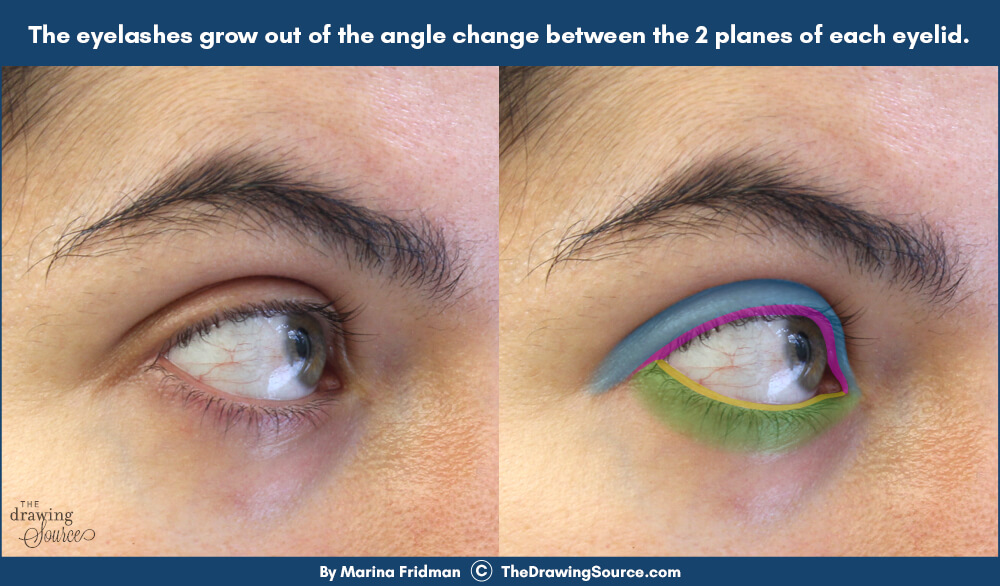
The eyelids have a thickness. This gives each eyelid two planes that we must notice and draw.
The upper eyelid has a front plane and a bottom plane. The lower eyelid has a front plane and a top plane.
Eyelashes grow out of the angle change between the two
planes of each eyelid.
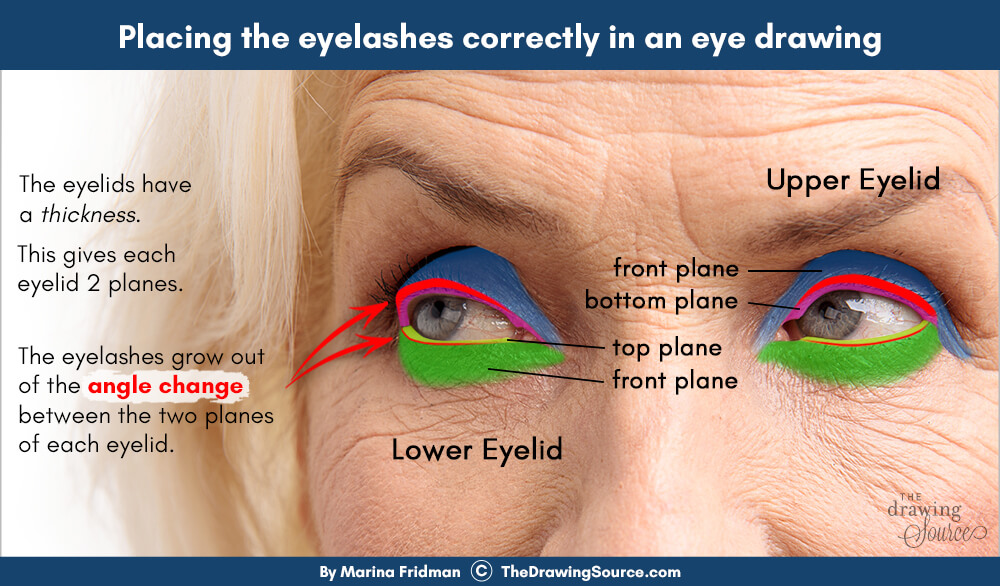
Where is that angle change?
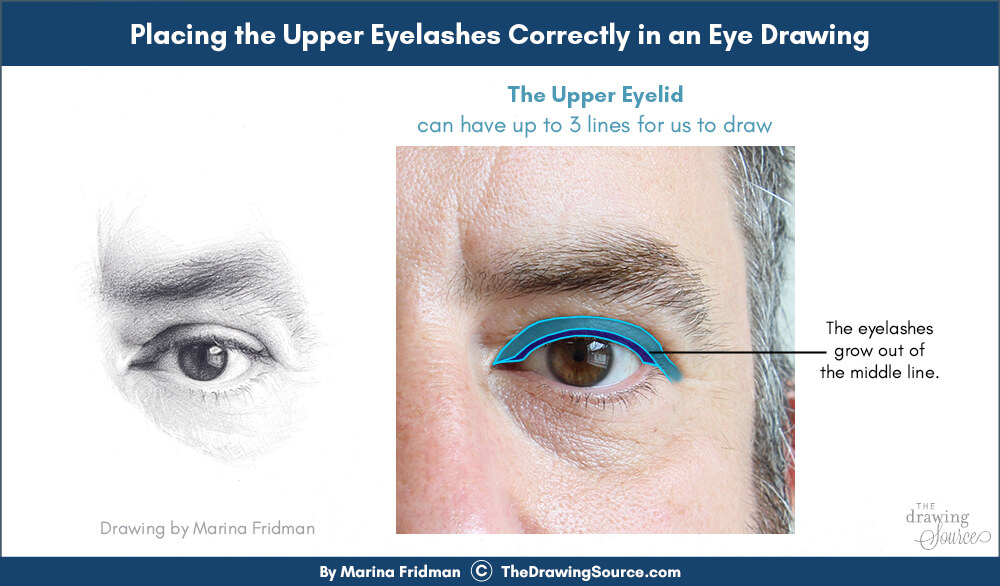
In the image below, looking at the upper eyelid first, notice three lines:
- the top of the upper eyelid,
- the middle line separating the front plane from the bottom plane, and
- the third line, where the bottom plane contacts the eyeball.
Eyelashes grow out of the middle line – that is where the
angle change is between the two planes.
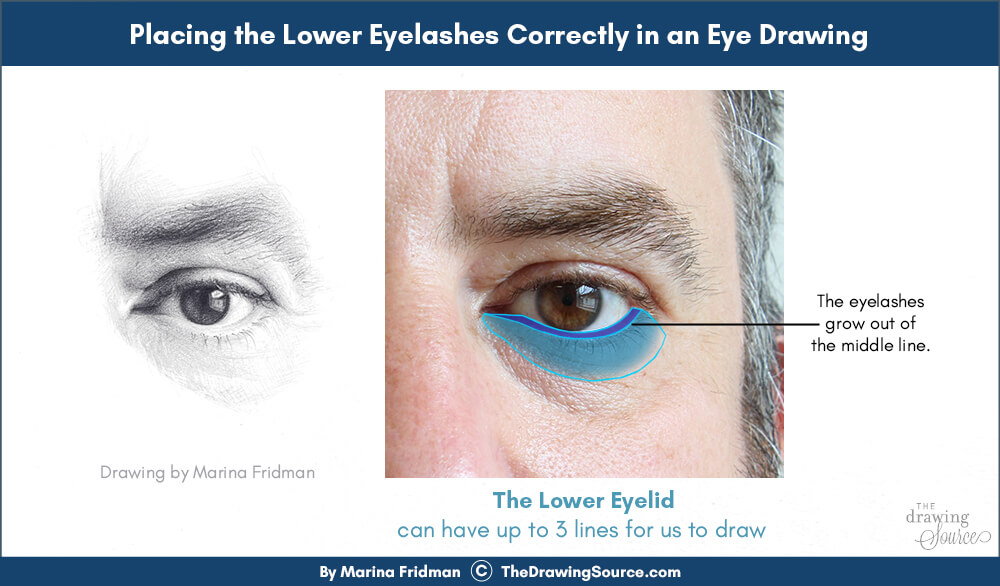
It’s similar on the lower eyelid (shown in the image below). From a front view, when
we can see both planes, the lower eyelid will also have up to three lines for
us to notice and draw.
Here:
- The top line indicates where the eyelid contacts the eyeball.
- The middle line separates the top plane from the front plane, and
- The third line closes off the front plane. On the lower eyelid, often this line will fade out.
Again, the eyelashes grow out of the middle line
separating the top plane from the bottom plane.
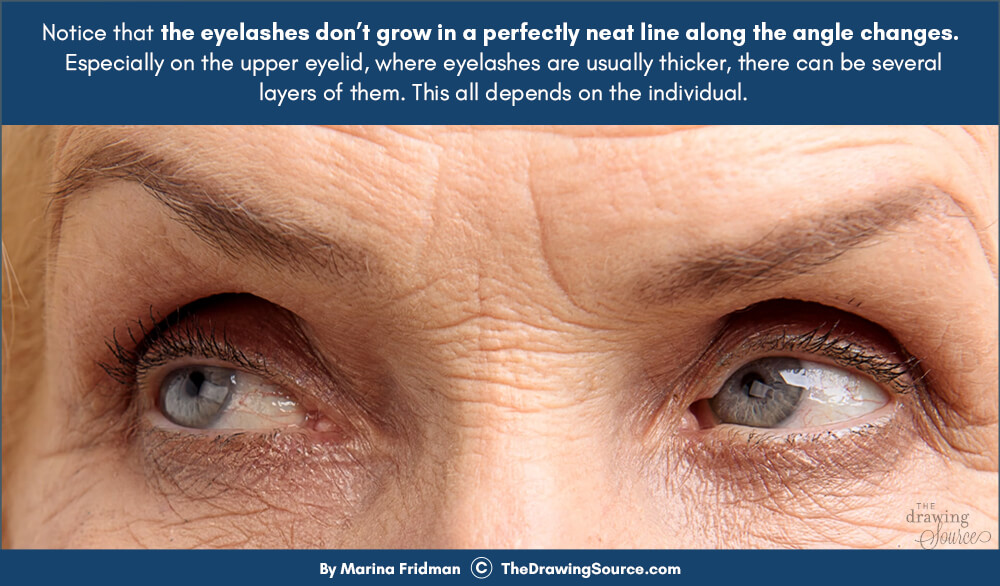
If we zoom in on the eyes below, you’ll see that the eyelashes don’t
grow in a perfectly neat line along the angle changes. Especially on the upper
eyelid, where eyelashes are usually thicker, there can be several layers of
them. This all depends on the individual.
Now, even
though it helps to know that the eyelashes grow out of the middle line, we
often still need to look really closely to find it, because it will often be
subtle or obscured. This is
partly due to the Structure of the eyelashes:
2) Structure:
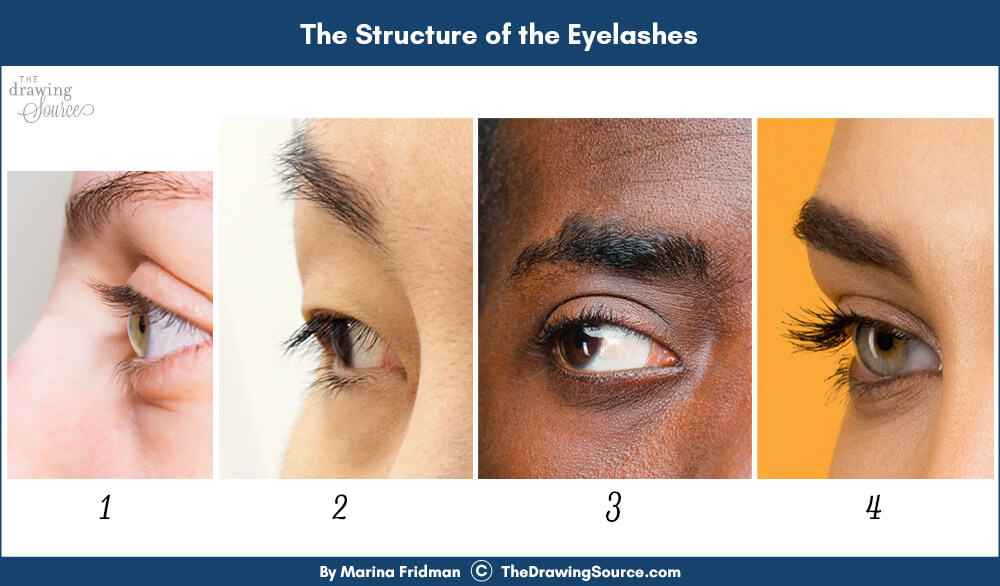
In the images below, notice that
upper eyelashes usually curve up slightly, and lower eyelashes curve down
slightly (Figure 1), though this will vary depending on the individual. Some people might
have straighter eyelashes (Figure 2), and others have much more curving eyelashes (Figure 3). Makeup
can also greatly influence this (Figure 4).
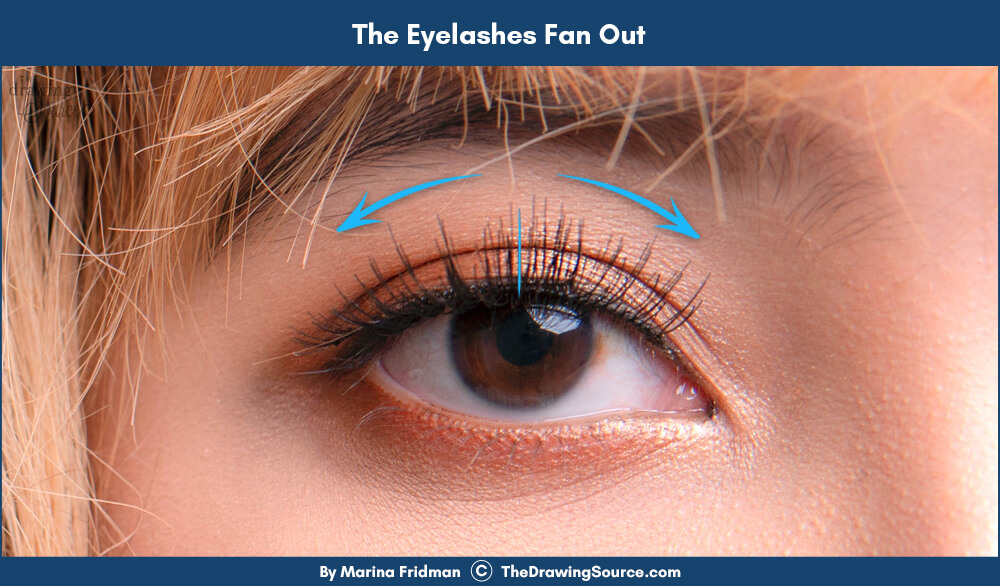
Next, notice that eyelashes fan out (image below). So, if you’re viewing your model from the front, there will often be an eyelash that directly faces you – it will appear as a vertical line, straight up and down.
To the left of it, the eyelashes fan to the left. The farther to the left the eyelash is, notice the difference in the angle and the degree of curvature. The farther to the right of the straight, vertical eyelash, the more the eyelashes angle to the right towards 180 degrees.
The
angle and degree of curvature increases the farther the eyelash is to the left
or right. This will be
important for us to notice and draw.
Because eyelashes are often curved and fan out, this can make it trickier to see exactly where they begin. Even when it doesn’t seem like it, they do originate at the angle change between the two planes of each eyelid. That middle line that I pointed out.
If
we look at a clearer example (below), if we trace each eyelash here to its root, we
will see that they do, indeed, originate at that angle change.
3)
Eyelashes are rarely evenly spaced or the same length.
Those perfectly manicured eyelashes that you see in magazines are quite unrealistic, and not what most people’s eyelashes look like.
Personally, I love drawing real people’s unphotoshopped eyes and eyelashes. But, to draw them believably and realistically, we must learn to observe the variations in eyelashes closely, so that we can represent them convincingly in our drawings. This begins by analyzing what we see.
I give you a whole list of questions to ask yourself when observing eyelashes in Tip 3 of my 8 Tips for Drawing Realistic Eyelashes video.
Let’s move on to the
step by step demonstration of drawing these eyelashes.
How to Draw Eyelashes: Step by Step Tutorial
Drawing the Upper Eyelashes
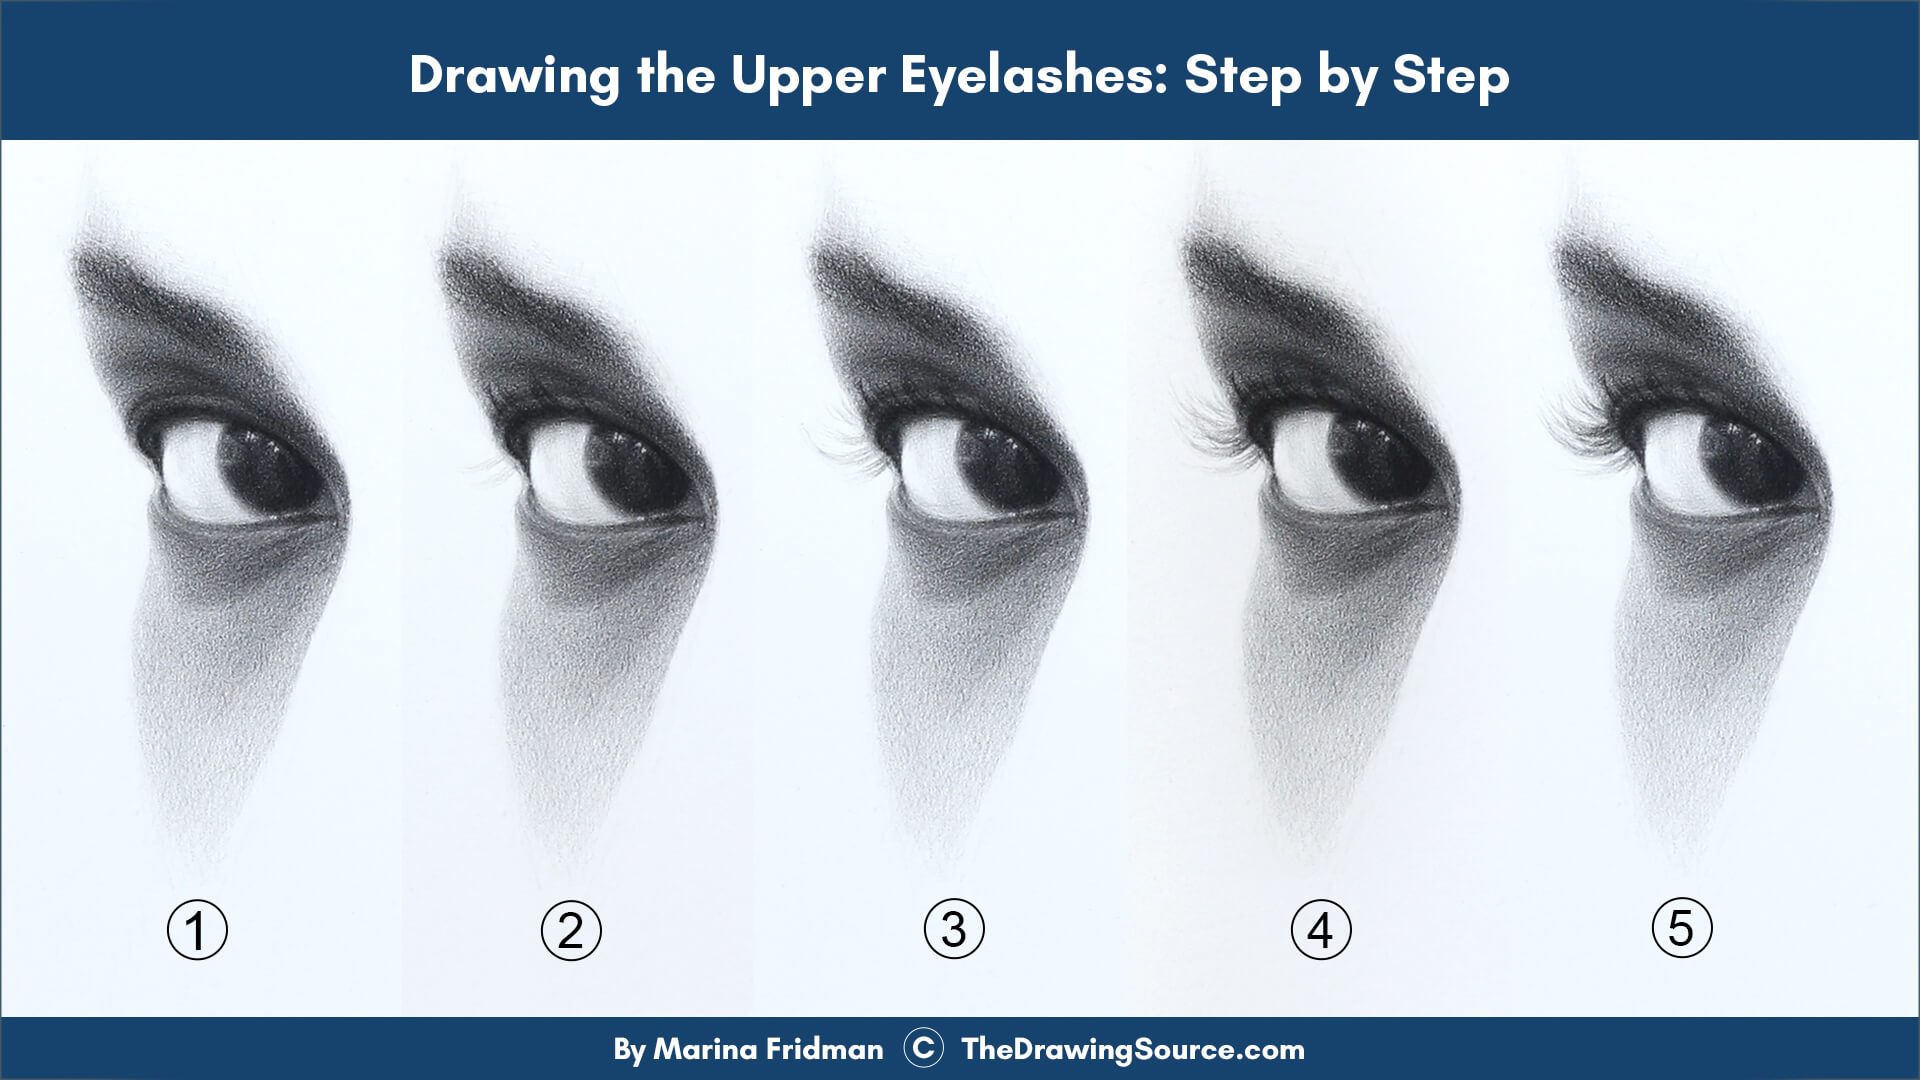 How to draw eyelashes step by step
Step 1) Start with the eyelash that feels easiest to place accurately.
In this case, for me, it’s the farthest eyelash on the upper
eyelid. As I draw it, I visualize a horizontal line through this point where
the eyelids meet, and look to see – how far above this line is this eyelash? I
can also look at the negative space between the eyelash and the horizontal line.
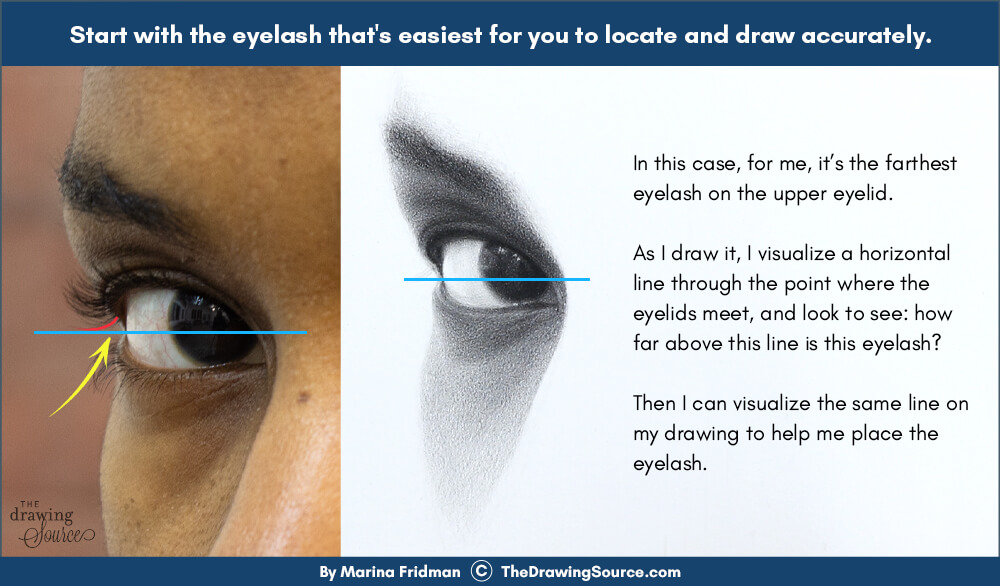
Then I can
visualize the same line on my drawing to help me place the eyelash.
Step 2) Map out the eyelashes.
My intention is to approach drawing the eyelashes in a few passes, usually two. In the first pass, I’m simply mapping where the eyelashes will go, so I’m drawing very lightly so that I can erase if I need to. I’m not positive yet about the placement of anything, so I don’t want to lock in my drawing with any sharp or dark lines.
In this step, I continue mapping the eyelashes, following the ones that feel easiest and most obvious to me.
If I feel more confident placing an eyelash in another area, I can move to that area. We don’t have to draw from left to right.
If I exaggerate something or the angle looks off, I can correct it with a kneaded eraser. It’s an essential tool for me that I use just as much as my pencil. You can learn how to use a kneaded eraser for realistic drawing in the video at this link.
I
spend most of my time looking, and a fraction of that time drawing.
I’m looking closely at:
- the length of the eyelashes
- the spacing between the eyelashes or groupings of eyelashes
- at the shape of the groupings
- the angle of the eyelash or grouping I’m drawing, and
- how curved or flat the eyelash or grouping is
Notice that I start indicating groupings of eyelashes as soon as possible, instead of drawing each eyelash individually/separately.
Drawing these eyelashes precisely definitely takes pencil control and dexterity, which needs to be learned and practiced. I’m using certain pencil strokes that I teach in my Foundations of Drawing Technique course. Without foundational drawing technique, it’s very difficult to draw precisely, to regulate the quality of your line (how light, dark, sharp or soft it is), or to shade effectively.
Step 3) Finish the first pass of the eyelashes.
Once I’m feeling fairly confident in the
- placement,
- angles,
- length and
- groupings
Of the eyelashes, I consider the first pass to be complete, and I start my
second pass, where I can darken and sharpen some of the lashes.
 How to draw eyelashes step by step
Step 4) Start the second pass of the eyelashes.
As I start the 'second pass' of the upper eyelashes, I’m continuing to look very closely to evaluate:
- Where are the thickest or largest groupings?
- Where are the darkest groupings? The lightest groupings?
- And the darkest and lightest individual hairs?
I’m also paying attention to the edge quality of the eyelashes.
- Which eyelashes are the sharpest?
- Which are the softest?
I cover how to determine which edges in the eye are sharpest in Part 3 of my Most Common Eye Drawing Mistakes video series, which I suggest you watch next.
You might
notice that I rarely draw an eyelash using a single line. Instead, I build up
the value through multiple pencil strokes. This lets me check if it’s in the
right place several times before darkening it to the point of not being
able to erase it. Only once I’m fully confident in the placement, shape, angle,
and curvature of an eyelash do I make a dark, sharp line. Where it’s needed, of
course, not all of these eyelashes are dark or sharp.
I’m looking
for a balance of unity in the eyelashes so that they look realistic, but
enough variety to make them interesting. Watch this video on 8 tips for drawing more realistic eyelashes for more on this!
I can refer to the reference for all of this, because a beautiful balance of unity and variety already exists there. Then, closer to the end of the drawing, I can decide if I want to take any artistic liberties. I already am a little bit, I’ve definitely exaggerated the length of the eyelashes in my drawing slightly. It’s hard not to.
As I get closer to finishing these eyelashes, I start looking for smaller details, like this eyelash that curves up at a steeper angle and intersects the eyelashes above it. Those details can infuse our drawings with life, but only once we have the general spacing, correct placement, and proportions. We work from general to specific.
Step 5) Here are the
finished upper eyelashes.
How to Draw Eyelashes:
Drawing the Lower Eyelashes
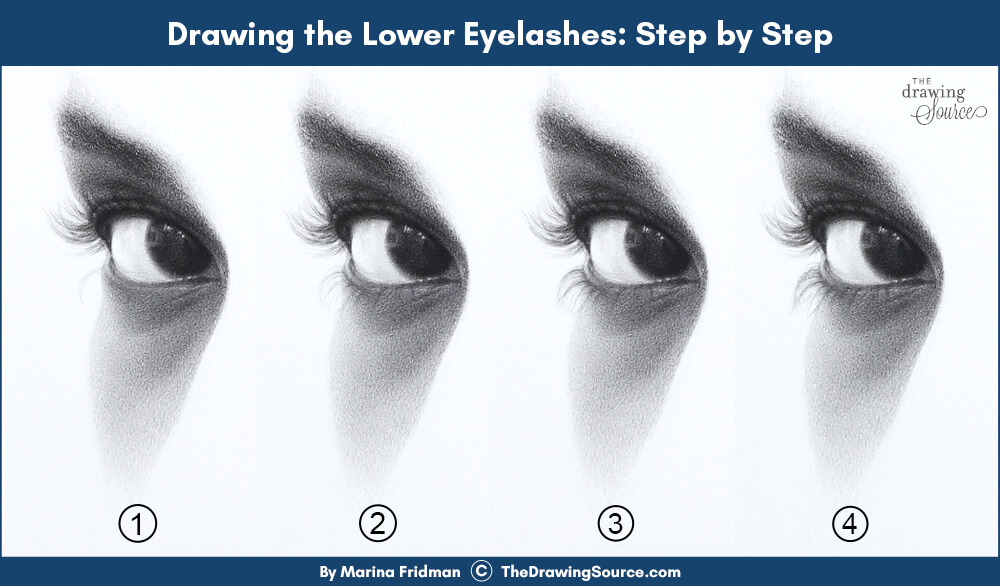
Step 1) Start with the easiest lower eyelash to place accurately.
Turning my attention to the lower eyelashes, again I start with the one that feels easiest to place accurately. I start very lightly, just mapping the location of the groupings and individual eyelashes.
I’m paying attention to:
- their angle,
- degree of curvature,
- and their length
If you
look closely - the angle, curvature and length of each eyelash is unique.
Communicating that in a drawing is what creates a realistic, believable,
naturalistic look.
Step 2) Map the lower eyelashes.
Notice how much shorter the eyelashes closer to the nose appear, and how much less curved they look.
Step 3) Start the second pass of the lower eyelashes.
I can fill out some of the groupings before moving on to my second pass of the lower eyelashes.
Though I’ll darken a few of the lower eyelashes that need to be darker, notice that generally speaking, the lower eyelashes here appear lighter than most of the upper eyelashes.
Step 4) Add finishing touches and details.
I love the
eyelashes at odd angles, or the ones that intersect other eyelashes. I add some of those, to bring variety to my drawing. Then, I re-approach the drawing as a whole, adding finishing touches.
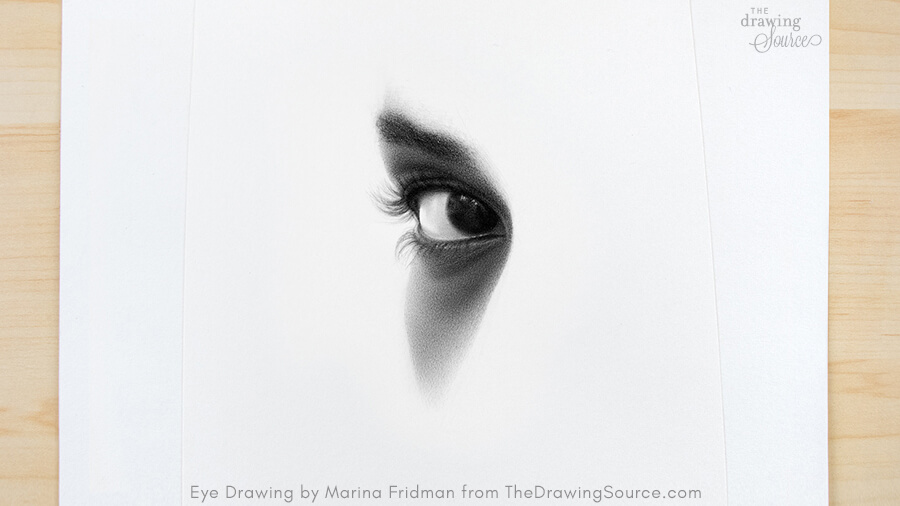 How to draw eyelashes: the finished eye drawing
Once
I finished the eyelashes, I spent a considerable amount of time adding detail
to the drawing, smoothing out values, and darkening certain areas. (You can learn my 6-step eye drawing process in this video!) Here is the finished eye drawing, above.
Next steps to learn how to draw eyelashes:
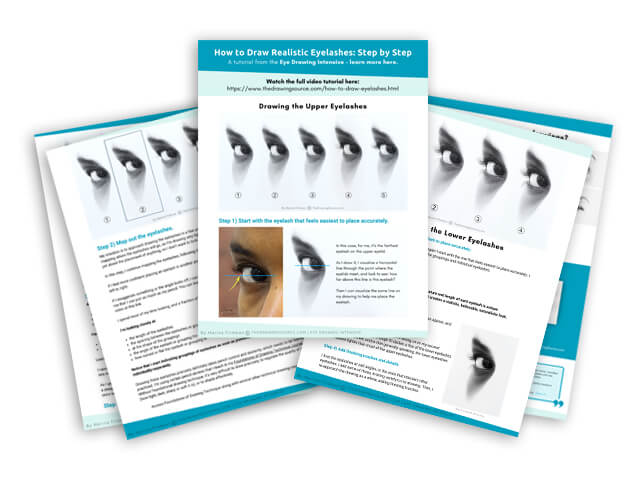
1) Download the free step by step guide to drawing realistic eyelashes below:
2) Watch the full, free Draw Better Eyes video series!
3) Transform your eye drawings in the Eye Drawing Intensive:
Happy drawing,

Enjoyed this page? Please share it!
Pinnable images and share buttons below:
If you enjoyed this page on how to draw eyelashes, you may also be interested in ...
Related Pages:
8 Tips for Drawing More Realistic Eyelashes [Video]
Draw Better Eyes - free Toolkit!
The 6-Step Eye Drawing Process [Video Tutorial & Downloadable Guide]
How to Draw Eyebrows [Step by Step Tutorial]
How to Draw Realistic Eyes [Step by Step Tutorial]
Return from How to Draw Eyelashes to:
The Eye Drawing Hub | Portrait Drawing | Drawing Tutorials | Home
