- Home
- Foundational Skills
- Realistic Shading Hub
- Light and Form
Value, Light and Form in Realistic Drawing
The Elements of Light and Shadow on the Sphere, Figure, and Portrait
Drawing convincing light and form separates a flat drawing from one that looks dimensional, solid and real. It starts with understanding the elements of light and shadow. That's exactly what you'll learn here: what they are, why they're important, and how to identify them on a sphere, the figure, and portrait.
*If you're new to the concept of value in drawing - start on this page, and then return here!
What are the Elements of Light and Shadow?
The elements of light and shadow are the predictable effects that appear
when light interacts with a form and its surroundings. In realistic
drawing, we use them to create believable illusions of depth
and three-dimensional form.
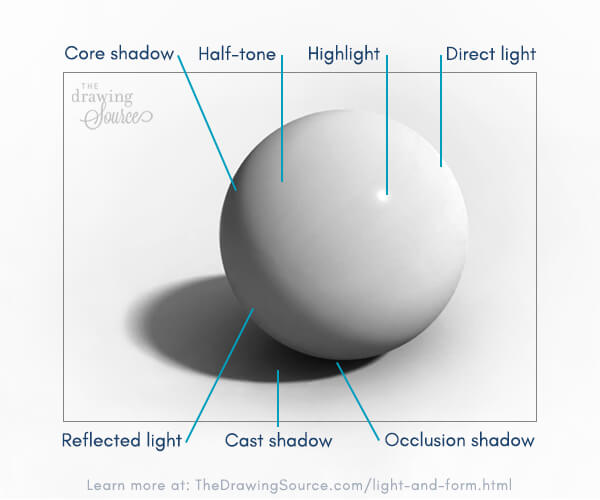
These seven appear again and again across many subjects:
- Direct light — the area of the form facing the light source, receiving the most light.
- Highlight — the small, brightest point, a reflection of the light source itself. The 'lightest light value.'
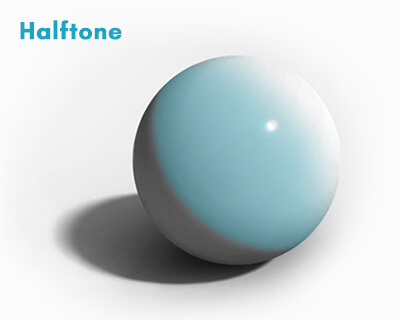
- Halftone — the gradation between the direct light and the core shadow.
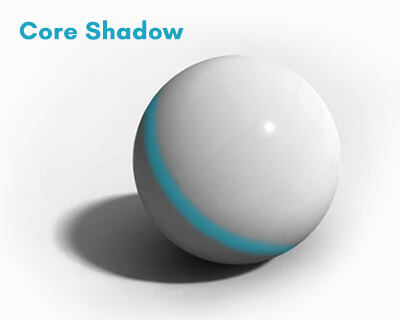
- Core shadow — the dark band where light transitions into shadow; the darkest part of the form shadow.
- Reflected light — light bounced from nearby surfaces that lightens a shadow.
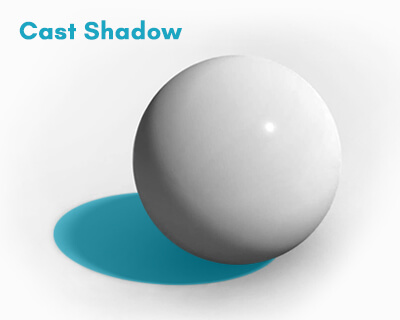
- Cast shadow — the shadow the form casts onto the surface it rests on.
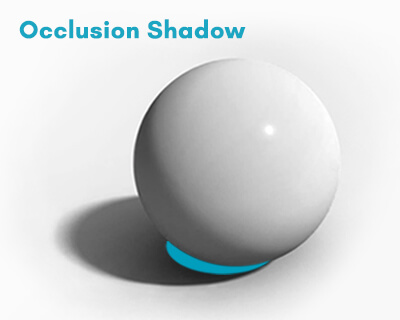
- Occlusion shadow — the darkest part of the cast shadow, where the form meets the surface and almost no light can reach.
We'll explore each one in depth below, on a sphere, the figure and portrait.
Why are the elements of light and shadow essential for realistic drawing?
Realistic — or representational — drawing is quite literally re-presenting what we see in front of us, on paper.
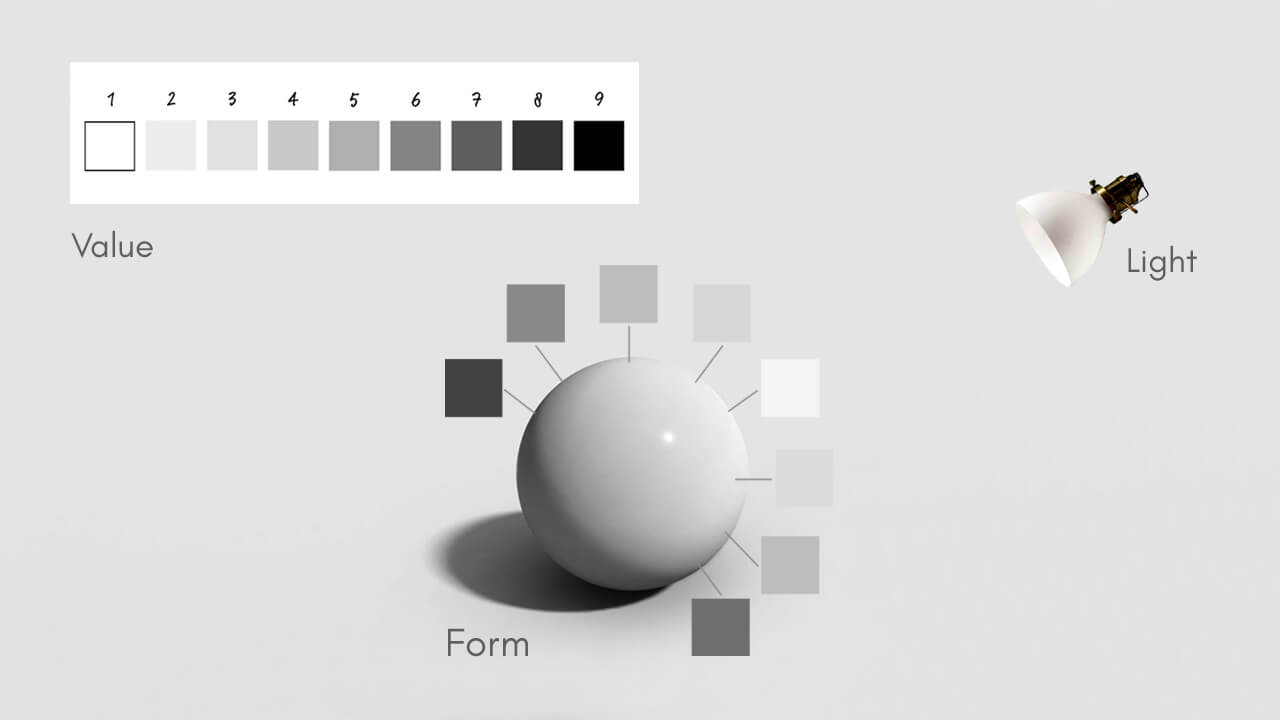
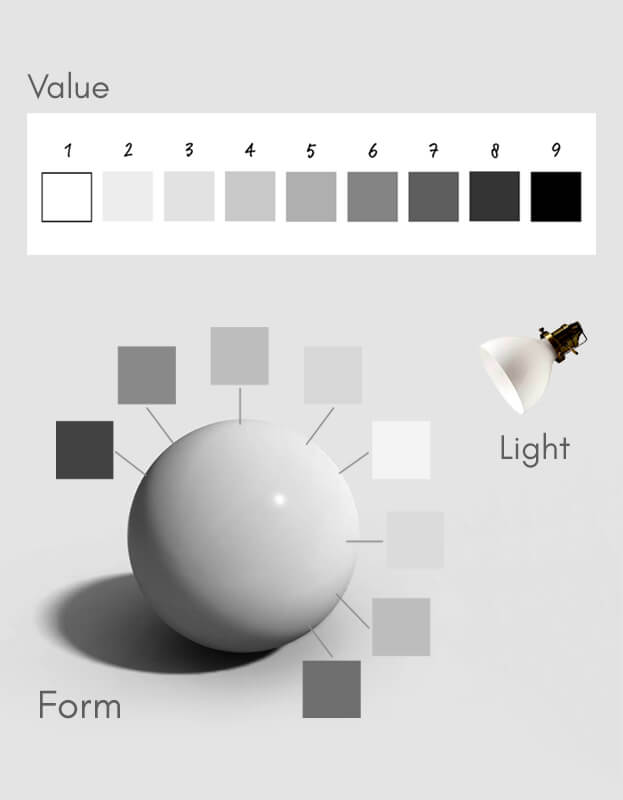
The combination of light and shadow creates a range of values, and those values create the illusion of form.
When we can accurately see and mimic the way light falls on form, our drawings start to feel real — like we could almost reach right into them.
'Accurately seeing' how light falls on form means recognizing certain patterns of light and shadow that occur consistently across all subjects. Once we become aware of them, we start
seeing more accurately what a form needs — and understanding why a
drawing looks flat without them.
What if we don't learn to see these elements?
We won't draw them convincingly — because we can't draw what we can't see, and we often can't see what we don't know to look for!
The best way to learn these elements is to study them on simple forms — such as a sphere.
Why study light and shadow on basic forms?
Every complex subject we draw can be thought of as a combination of basic forms — whether it's an object, a face, or a figure:
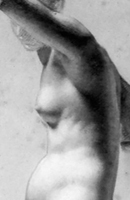
An egg becomes a ribcage.

A sphere becomes a cheek or the ball of a foot.
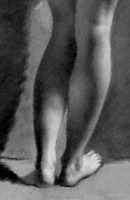
A cylinder becomes the framework for an arm or a leg.
These parts of the body are drawn the same way as the basic forms they're built from.
So, when we study basic forms, what we learn applies to everything else we'll ever draw — including the figure and portrait, as you'll see in the examples later on the page.
The Elements of Light and Shadow on Form
When forms are lit by a direct light, similar patterns of light and shadow occur.
First, we see two groups of values:
- The Light group — the area of the form that receives the most light from the light source, and
- The Shadow group — the area of the form that light can't (directly) reach, and is therefore in shadow.
Within these two groups are smaller, more specific elements:
Elements of Form in the Light Values:
1. Direct light
2. Highlight
3. Halftone
Elements of Form in the Shadow Values:
1. Core shadow
2. Reflected light
3. Cast shadow
4. Occlusion shadow
The Elements of Light on a Sphere:
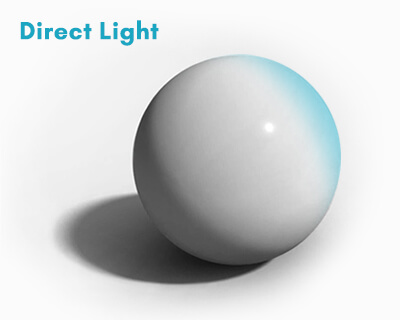
Direct Light
The direct light (also sometimes called the center light) faces the light source and receives the most direct light. After the highlight, the direct light is the lightest area on the form.
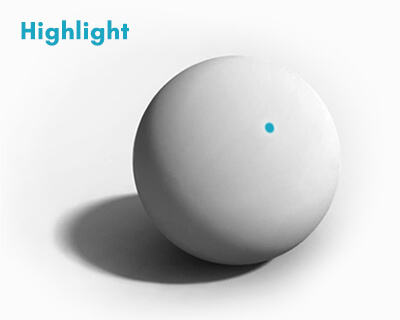
Highlight
The highlight is a reflection of the light source itself. Because it's a reflection, it moves depending on where you are in relation to it. Notice that it's lighter than the direct light.
Halftone
The halftone (also sometimes written half-tone) is the gradation between the direct light and the core shadow.
The Elements of Shadow on a Sphere:
Core Shadow
The core shadow is the dark band visible where light and shadow meet. It's the point at which light can no longer reach the form to illuminate it. It's the darkest part of the form shadow (the shadow on the sphere itself), because it's least affected by reflected light.
The
core shadow is sometimes called the terminator — rather dramatically —
because it's where light ends, and where the form falls into shadow.
It's also one of the most important elements because it describes the curvature of the form.
Drawing it incorrectly — not showing the correct curve of the sphere,
for instance — can make the form look flat, or simply unrealistic.
Reflected Light
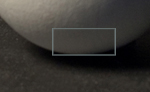
Light from the source can't directly reach the underside of the sphere. But it can reach the surrounding surfaces, bounce up, and lighten the bottom of the form. This is called reflected light.
Cast Shadow
The cast shadow is the shadow on the surface that the object rests on. It is created by the object itself blocking the light from the light source.
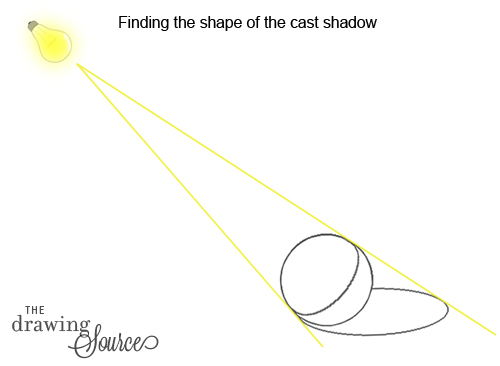
Finding the Shape of the Cast Shadow
There's a useful trick for finding the shape of the cast shadow. Imagine two light rays projecting from the light source to the core shadow on the form. Continue these lines until they hit the surface the object rests on, and they'll show you the boundaries of the cast shadow.
Occlusion Shadow
Part of the cast shadow, the occlusion shadow sits immediately below the form. It's the darkest part of the cast shadow, because it's least affected by both the light source and reflected light.
The Elements of Light and Shadow in Portraits
The same elements of light and shadow we saw on the sphere appear on the far more complex forms of the face.
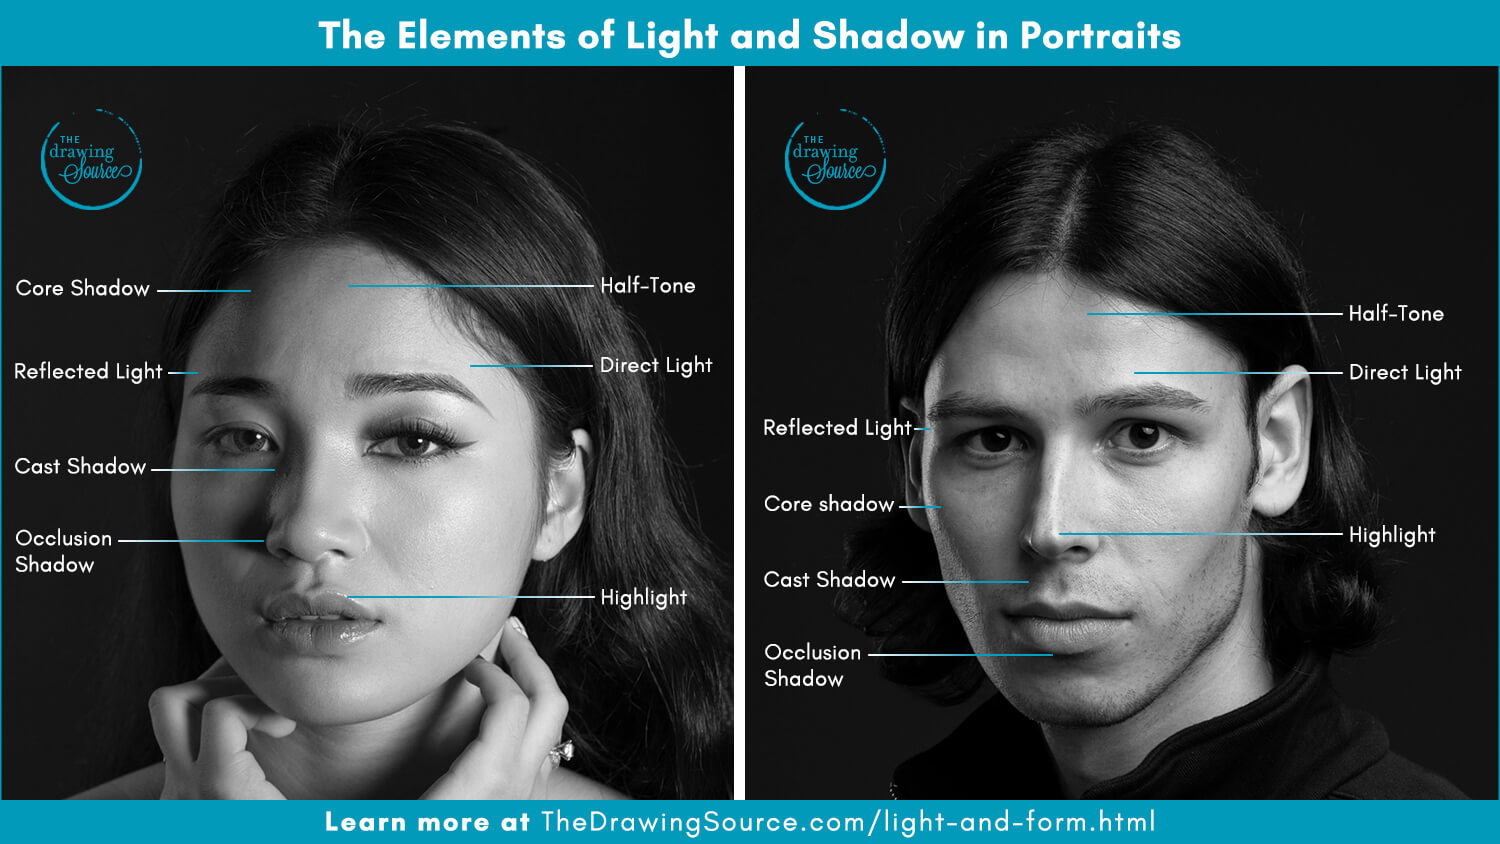
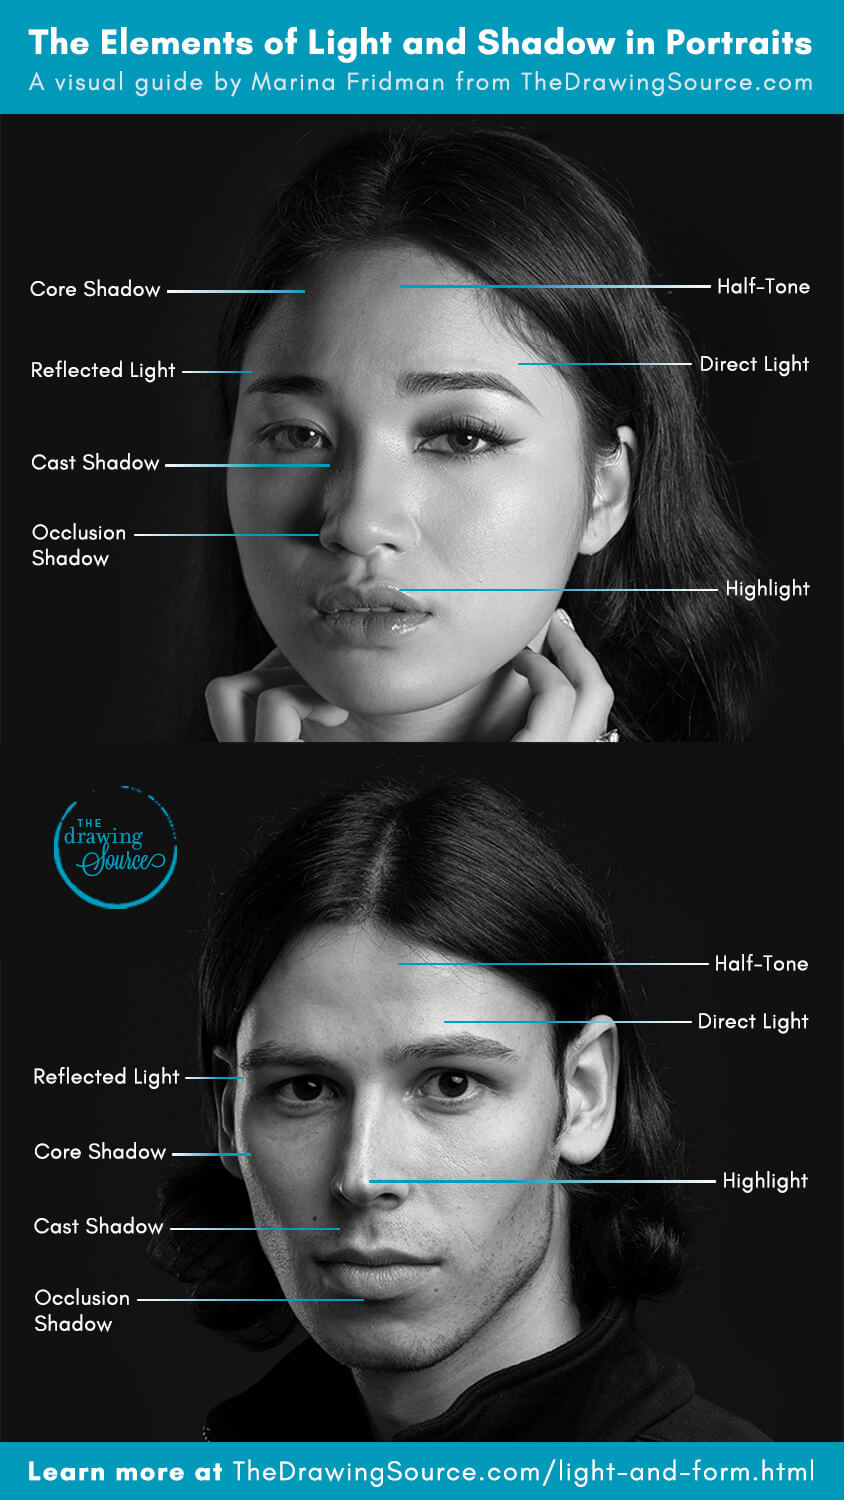
On each face below, I've labeled one of each element: a highlight, direct light, halftone, core shadow, reflected light, cast shadow, and occlusion shadow.
But if you look more closely, you'll find more of them. Unlike the sphere, the face is a compound form — one form built from many simpler ones, and each of those smaller forms has its own elements of light and shadow.
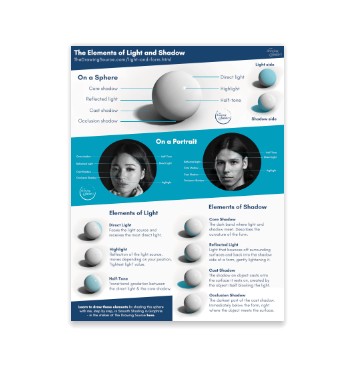
Download this free reference sheet to remember these elements of light and form!
As a visual exercise, in each portrait above see if you can find another:
- Highlight
- Direct Light
- Halftone
- Core Shadow
- Reflected Light
- Cast Shadow
- Occlusion Shadow
Once you start spotting them, you'll see them everywhere — and that's exactly the kind of seeing that makes drawing realistic portraits possible.
The Elements of Light and Shadow on the Figure
The same is true across the entire figure. Here, the elements of light and shadow appear on forms built from spheres, cylinders, and boxes — the ribcage, the pelvis, the rounded muscles of the arm and leg. What looks like an overwhelmingly complex subject is, once again, the same predictable light on the same basic forms you've been studying all along.
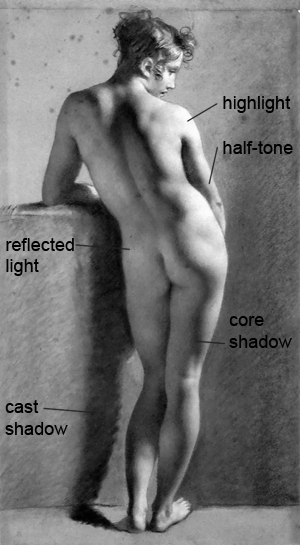 Figure drawing by Pierre Paul Prud'hon with elements of light and shadow on form
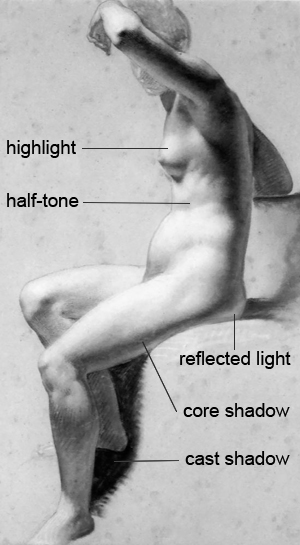 Figure drawing by Pierre Paul Prud'hon with elements of light and shadow on form
How do you learn to draw light and form?
Seeing these elements of light and shadow is the first step — after all, we can't convincingly draw what we can't see. The next step is learning to actually draw them.
The best way to start is by drawing a sphere: a single, simple form where all seven elements appear clearly:
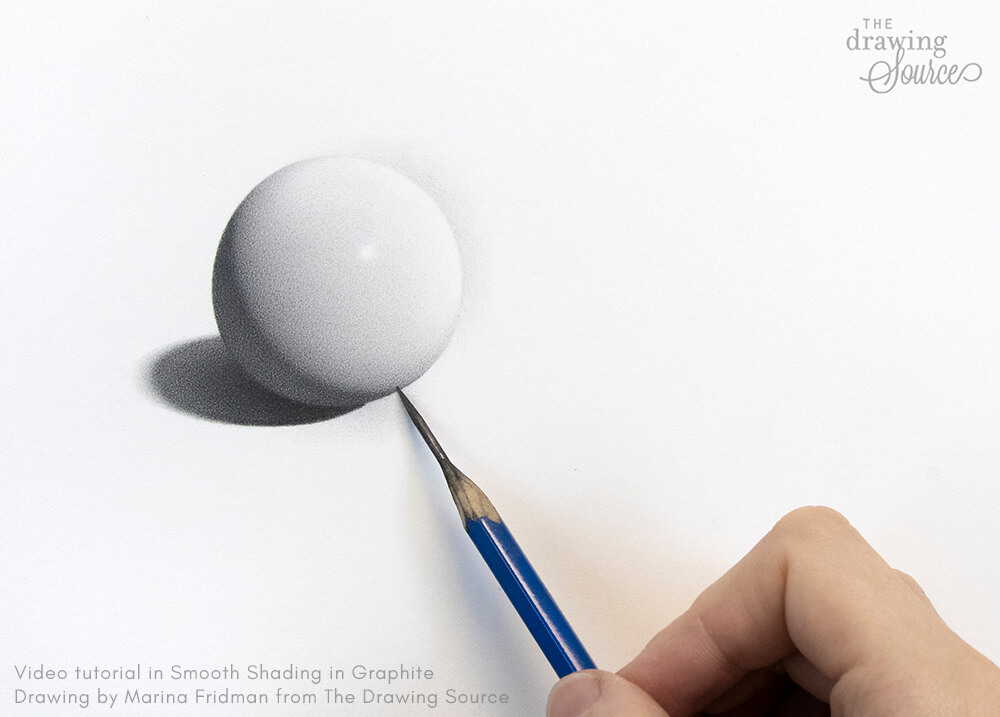 Draw this realistic sphere with me, step by step, in the Smooth Shading in Graphite video course.
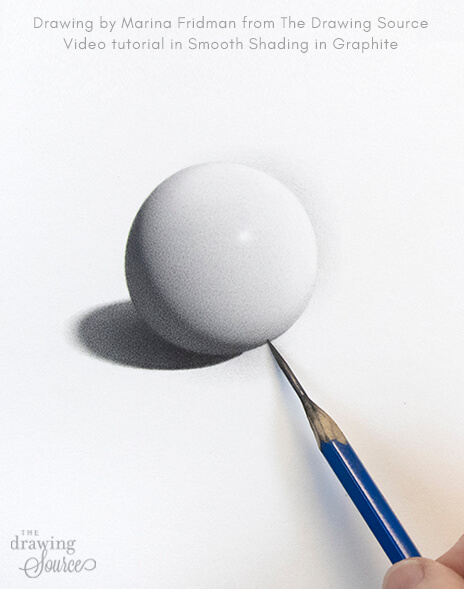 Draw this realistic sphere with me, step by step, in the Smooth Shading in Graphite video course.
By shading a sphere from a light block-in through to a finished,
three-dimensional form, you apply everything on this page to an actual
drawing — and build the control to render smooth, believable values and
edges.
You'll find a full, step-by-step sphere shading tutorial in Smooth Shading in Graphite, along with the technical skills to shade convincing light and form.

Smooth Shading in Graphite is one of the many courses you can take in the Atelier at The Drawing Source.
To give you a sense of what that deeper work involves, let's
look more closely at the kind of analysis we do inside the course: the value
relationships and the edge relationships between the elements of form. This is
the more nuanced seeing that separates a truly convincing, realistic drawing
from a flat one.
The 4 Levels of Drawing Convincing Light and Form
In drawing, the order of our steps matters.
Before we draw the elements of form, we first simplify what we see into major value groups — first into light and shadow, and then into a three-value structure of light, middle and dark. We can think of this as Level 1. (You can read more about value structure here.)
Level 2 is learning to recognize the specific elements of form, which we just covered on this page.
But to draw the elements of form convincingly, we also need to analyze the
value relationships between them (Level 3), and the edge relationships between
them (Level 4).
Correct value relationships create a convincing effect of
light. Correct edge relationships complete the illusion of depth and dimension.
And so, the more sensitively we observe these nuances of light and form and re-create them, the more believable our drawing becomes.
Let's start with the value relationships between the
elements of form.
Value Relationships Between the Elements of Form
We always start our value analysis by finding the
‘extremes.’
➤ Which element is the lightest light value in this scene?
The highlight. Notice that it's even lighter than the direct light. When we draw this sphere, we create the highlight by leaving it as the white of the paper, and surrounding it with the darker halftone. (You can see this process step by step and shade this sphere with me in Smooth Shading in Graphite).
➤ Which element is the darkest dark value?
The occlusion shadow, because the least amount of light can reach it.
➤ What is the darkest value on the form shadow (the shadow on the form itself)?
The core shadow is the darkest value on the form shadow.
Look how much lighter the reflected light is than the core shadow!
Subtle Value Shifts to Notice
Most of the elements of form are not one single value — they have gradations and value shifts within them. Notice the value differences that occur in the:
➤ Reflected light. There's a lightest area of the reflected light, and then it darkens toward both corners of the form shadow.
➤ Halftone. Notice how much darker it is around the edges of the sphere.
➤ The cast shadow. There are several gradations occurring in
the cast shadow! Can you find them?
Common Mistakes and Key Tips
One of the most common value relationship mistakes made when drawing the elements of form is making the reflected light too light. Remember that the reflected light is a shadow element. It needs to look like it's in shadow for your drawing to look convincingly real.
A general rule for drawing reflected light: To look convincing, the lightest part of the reflected light
must be darker than the darkest halftone.
This is the kind of value analysis that brings light and form to life in a drawing — and there's much more to see in every form you draw. For a deeper breakdown of these value relationships, and a
step-by-step video course on shading this exact sphere from start to finish,
join me in Smooth Shading in Graphite.
Edge Relationships
Between the Elements of Form
Edges are the transitions between values. How one value
turns into another value.
When one value abruptly ends and another begins, we have a sharp edge — as on a plane change or the edge of a form. When one value gradually turns into another value — like on a slowly turning form — we have a soft edge. The halftone on the sphere is a perfect example of a very soft edge.
Just as we did with values, to analyze the edges we'll start
by identifying the extremes:
➤ Where is the sharpest edge on this sphere?
Here the contour or boundary of the sphere is the sharpest edge. How can we tell? Because we can see exactly where one value ends, and the next one begins. There are no transitional values between the boundary of the sphere and the background.
➤ Where is the softest edge on this sphere?
The softest edge is the gradation from the direct light to the core shadow — the halftone.
There are some more to notice, though, that have a similar edge quality: The light gradations in the background are extremely soft. The gradations within the reflected light, and the gradations within the cast shadow, as well.
Subtle Edges to Notice
➤ The core shadow has two main edges: the transition from the core shadow into the halftone, and the transition from the core shadow into the reflected light. These may not have the same edge qualities! We need to observe how quickly or slowly both of these transitions occur.
➤ The edge of the highlight: notice how much softer it is than the boundary of the sphere (the sharpest edge).
➤ The many edge qualities within the cast shadow and around its boundary.
Just as we saw with values, an edge is rarely the same quality throughout. A perfect example is the boundary of the cast shadow.
Notice that it's the sharpest where it meets the sphere (though even there, it's still less sharp than the boundary of the sphere), and it softens as it moves away from the sphere.
Notice the different areas and 'rings' of value within the cast shadow — each area transitions through an edge that we need to observe sensitively!
Common Mistakes and Key Tips
The most common edge-related mistake is simply not observing the relationships between edges closely enough — and so not varying the edge quality enough in the drawing.
Edges are relative — it's the variety between them that makes a form read as solid and dimensional.
Look at the range of edges in this subject. Ordered from
sharpest to softest, they might look like this:
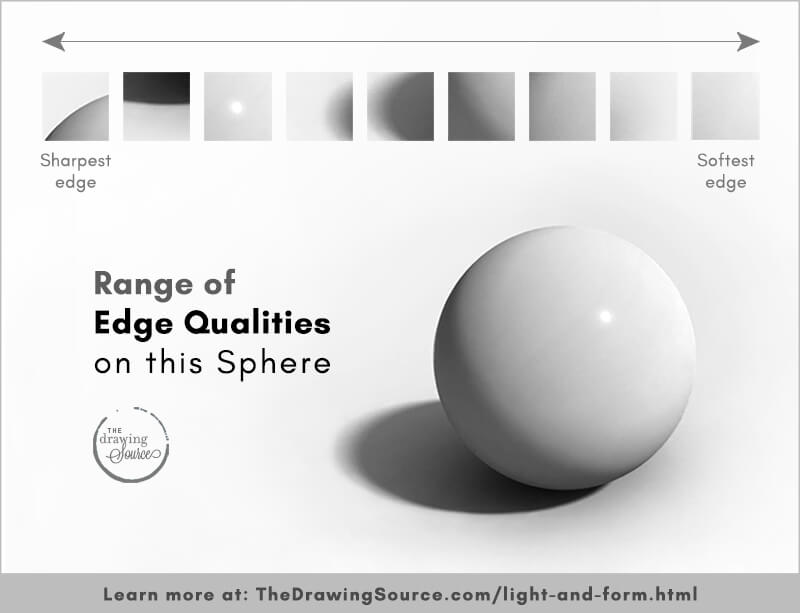
For every edge you draw, compare it to your two extremes —
the sharpest and softest edges in the subject — and ask, "Where on this
spectrum does this edge fall?"
Seeing edges is one thing; drawing them with control is another. In Smooth Shading in Graphite, you'll learn to create the full range, from the crisp boundary of a form to the softest halftone transition — the edge control that makes light and form in a drawing look convincing and three-dimensional.
The elements of light and shadow are everywhere, on every subject you'll ever draw. Once you can see them — their values, their edges, and the relationships between them — you're no longer guessing. You're observing what's really there, and re-creating it with intention. That's the foundation of realistic drawing, and it's a skill you can build.
Learn to shade realistic light and form
This page is from the Smooth Shading in Graphite video course, where you can acquire the knowledge, technical skills and modes of seeing you need to bring your drawings to life with beautiful, realistic shading.

By Marina Fridman — a professional visual artist, former tenure-track professor of art, and founder of The Drawing Source, where over 1,000 students have taken drawing courses.
Return to the Realistic Shading Hub from Value, Light and Form
Return to the Homepage from Value, Light and Form
Search the site above
Welcome to The Drawing Source!
This is an online school teaching realistic drawing through six foundational skills that unlock every subject.
Start here if you're new.
Then, explore these learning paths:

Hi, I'm Marina — a professional artist and former professor of art. I started this school to simplify realistic drawing into steps that are easy to understand and apply. Let's grow your skills and your enjoyment of the drawing process.
Realistic Drawing Curriculum
Develop your foundational skills and apply them to figure and portrait drawing in the Atelier membership.
$29/month USD or
$199/year (5 months free)
